Shells & Diamonds Kimono
For the free pattern of this garment please continue on this page. Please consider supporting me by purchasing the 100% ad-free PDF with full charts and schematics for this pattern on my ETSY page. Or consider joining my Patreon for member perks.
YAY! It’s Fall! My very favorite time of the year. I am so ready for the cooler weather, the changing of the leaves, and all the pumpkin spice!!! I know, cliche, but I LOVE fall flavors too! Also, it’s time to start breaking out all the wonderful cardigans, kimonos, sweaters and wraps!
It’s just honestly my favorite time to design for. I like summer knits and crochets too, but there’s just something super satisfying finishing all those snuggly makes that will keep me warm through the rest of the season.
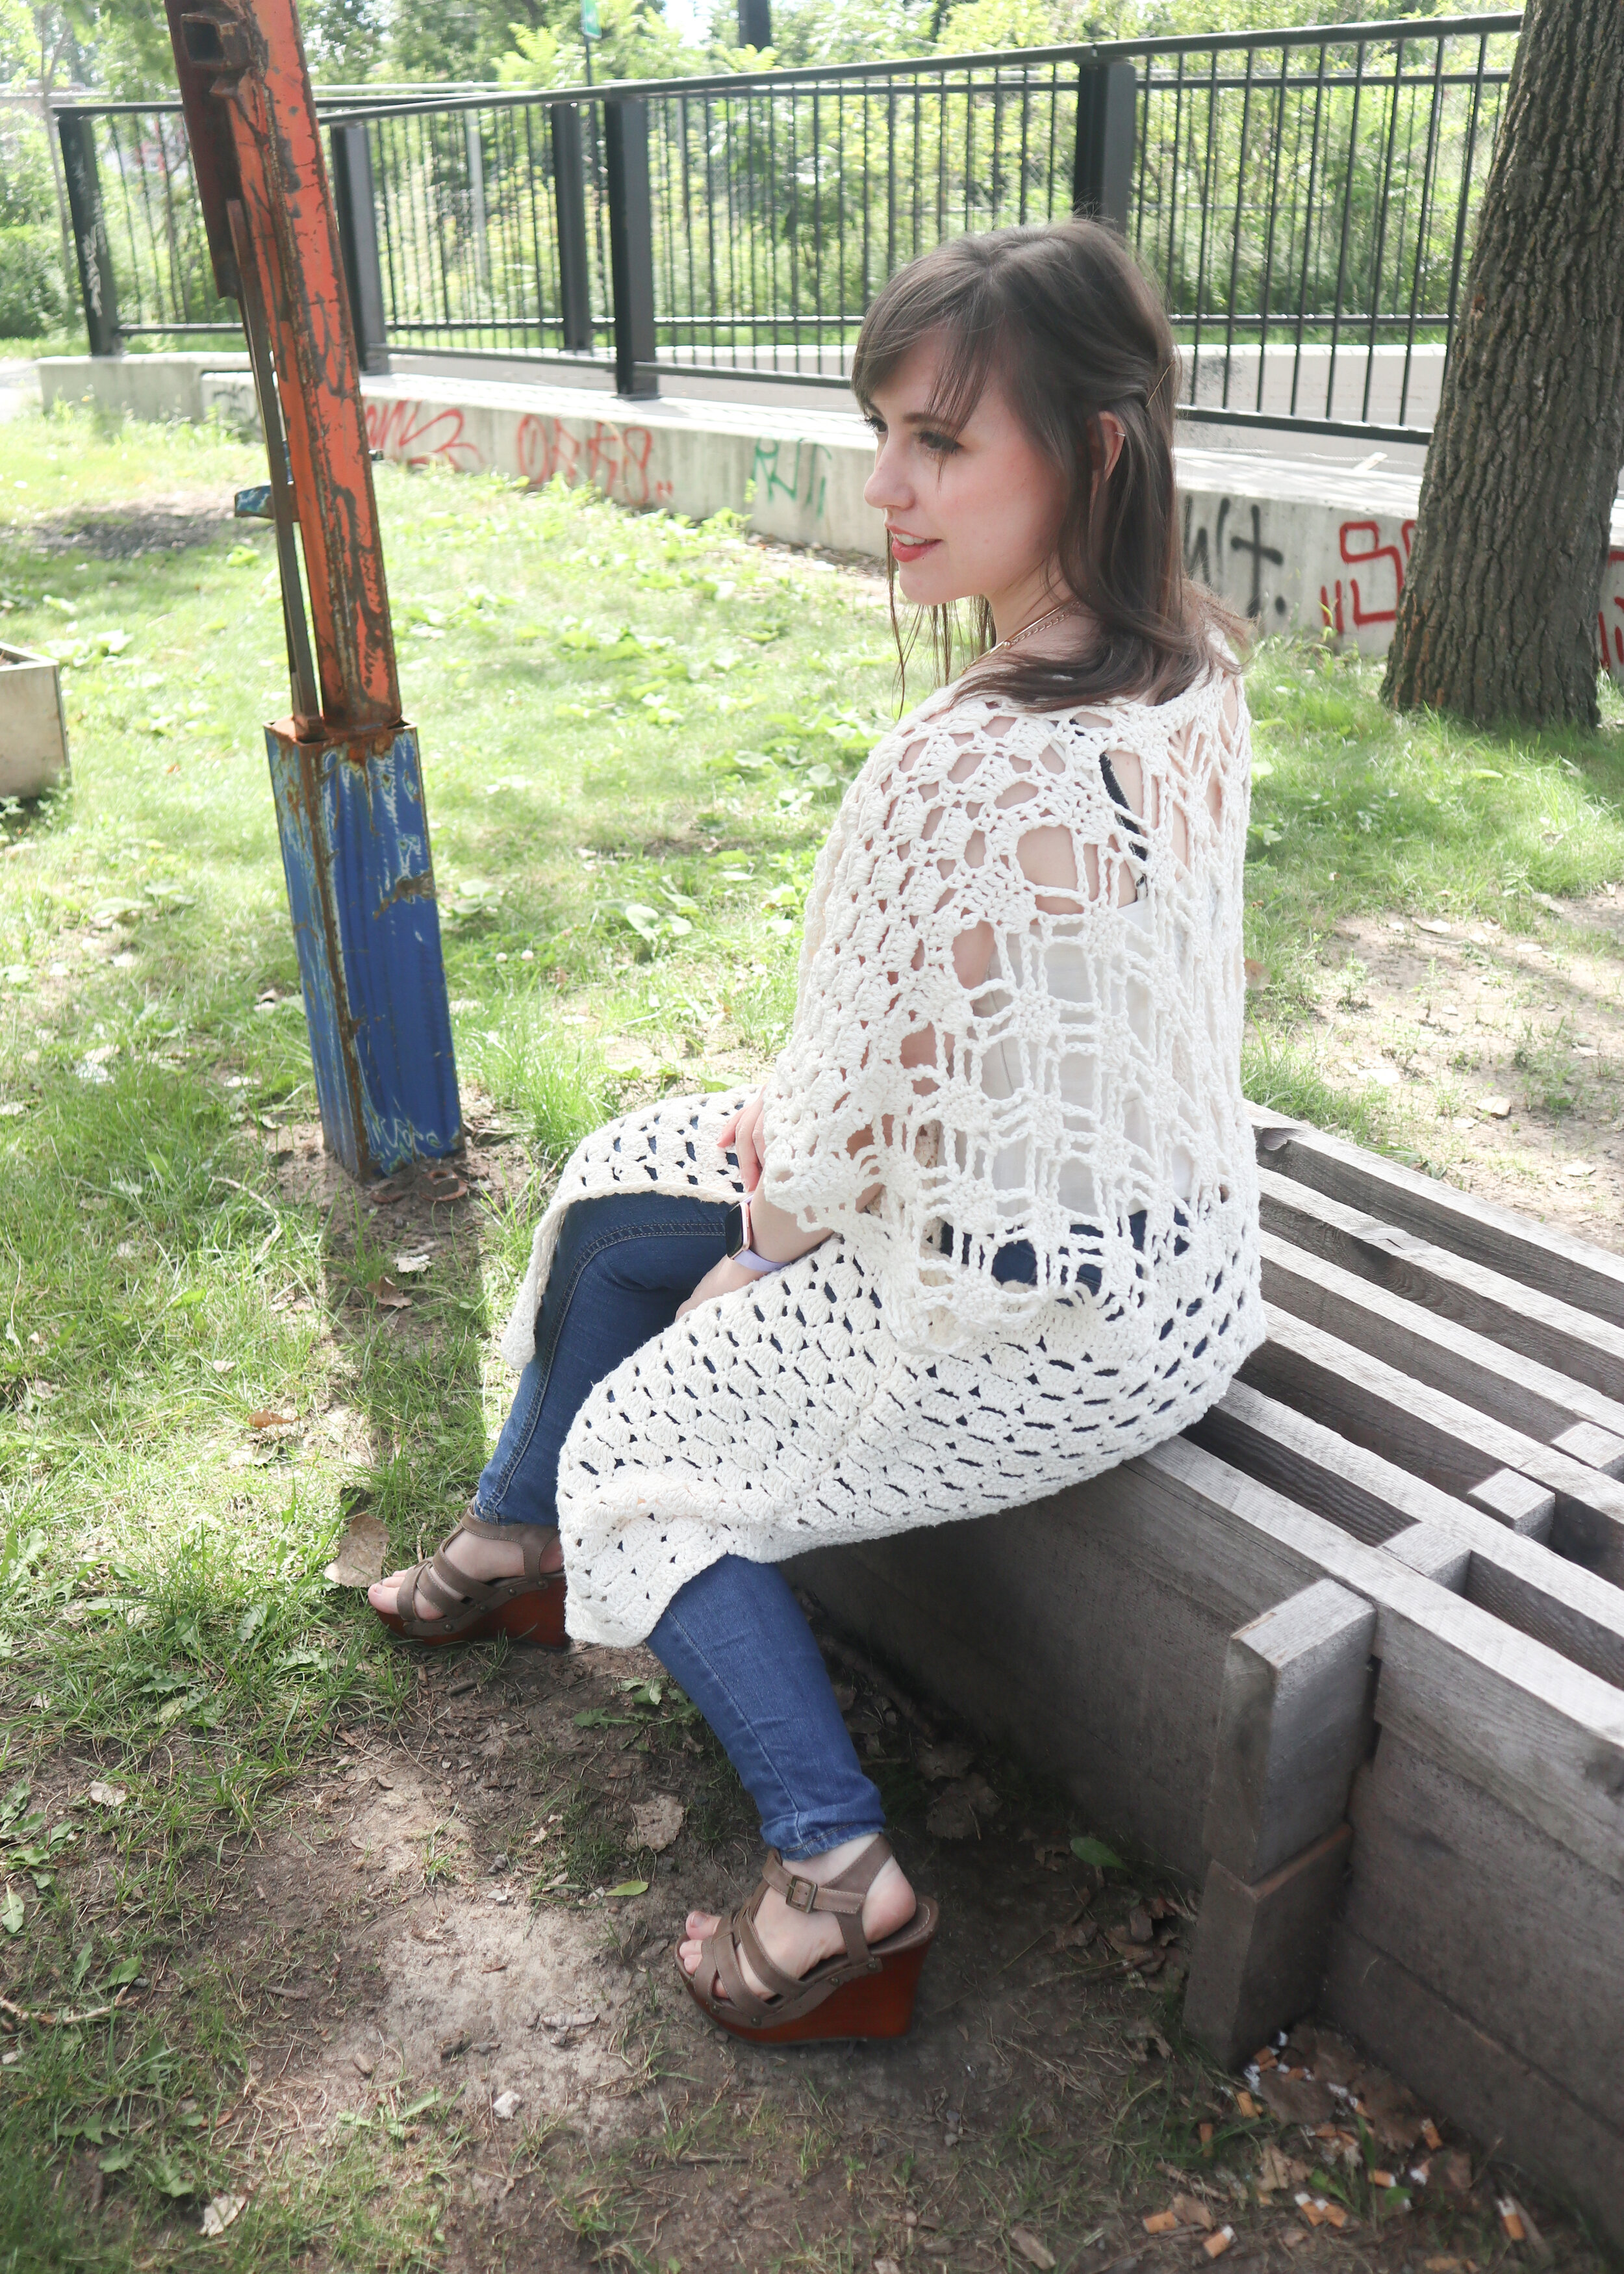
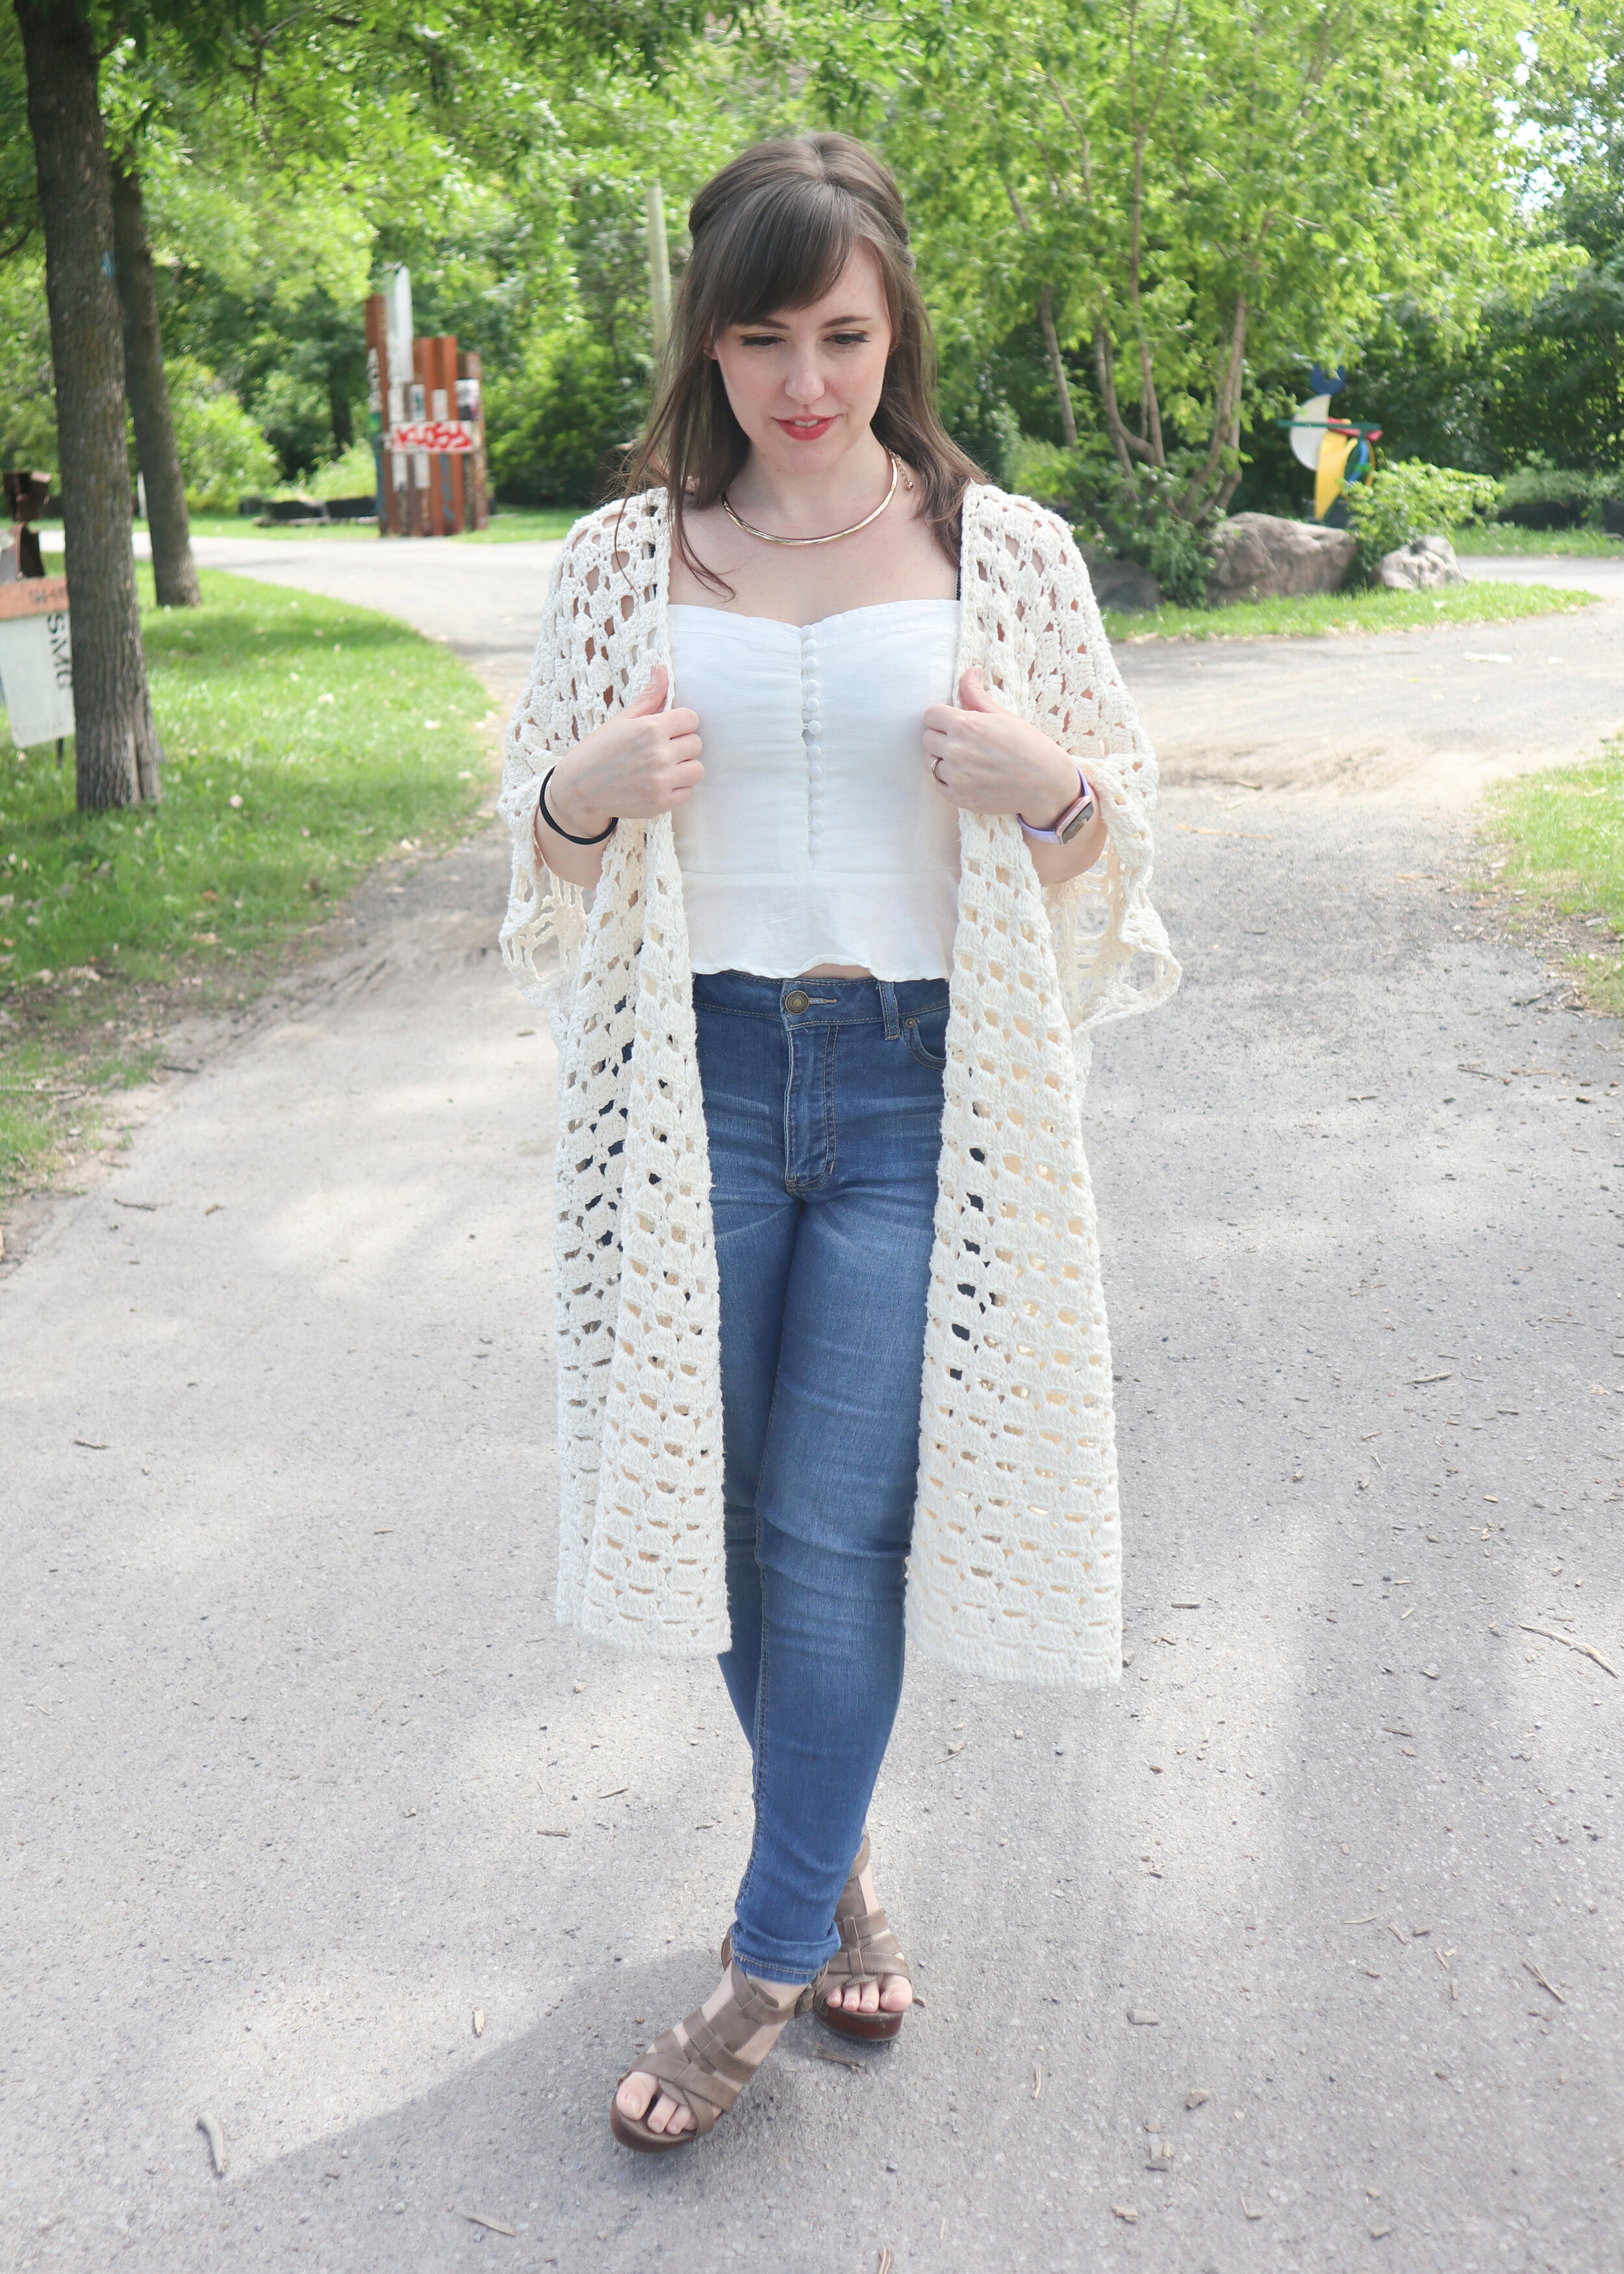
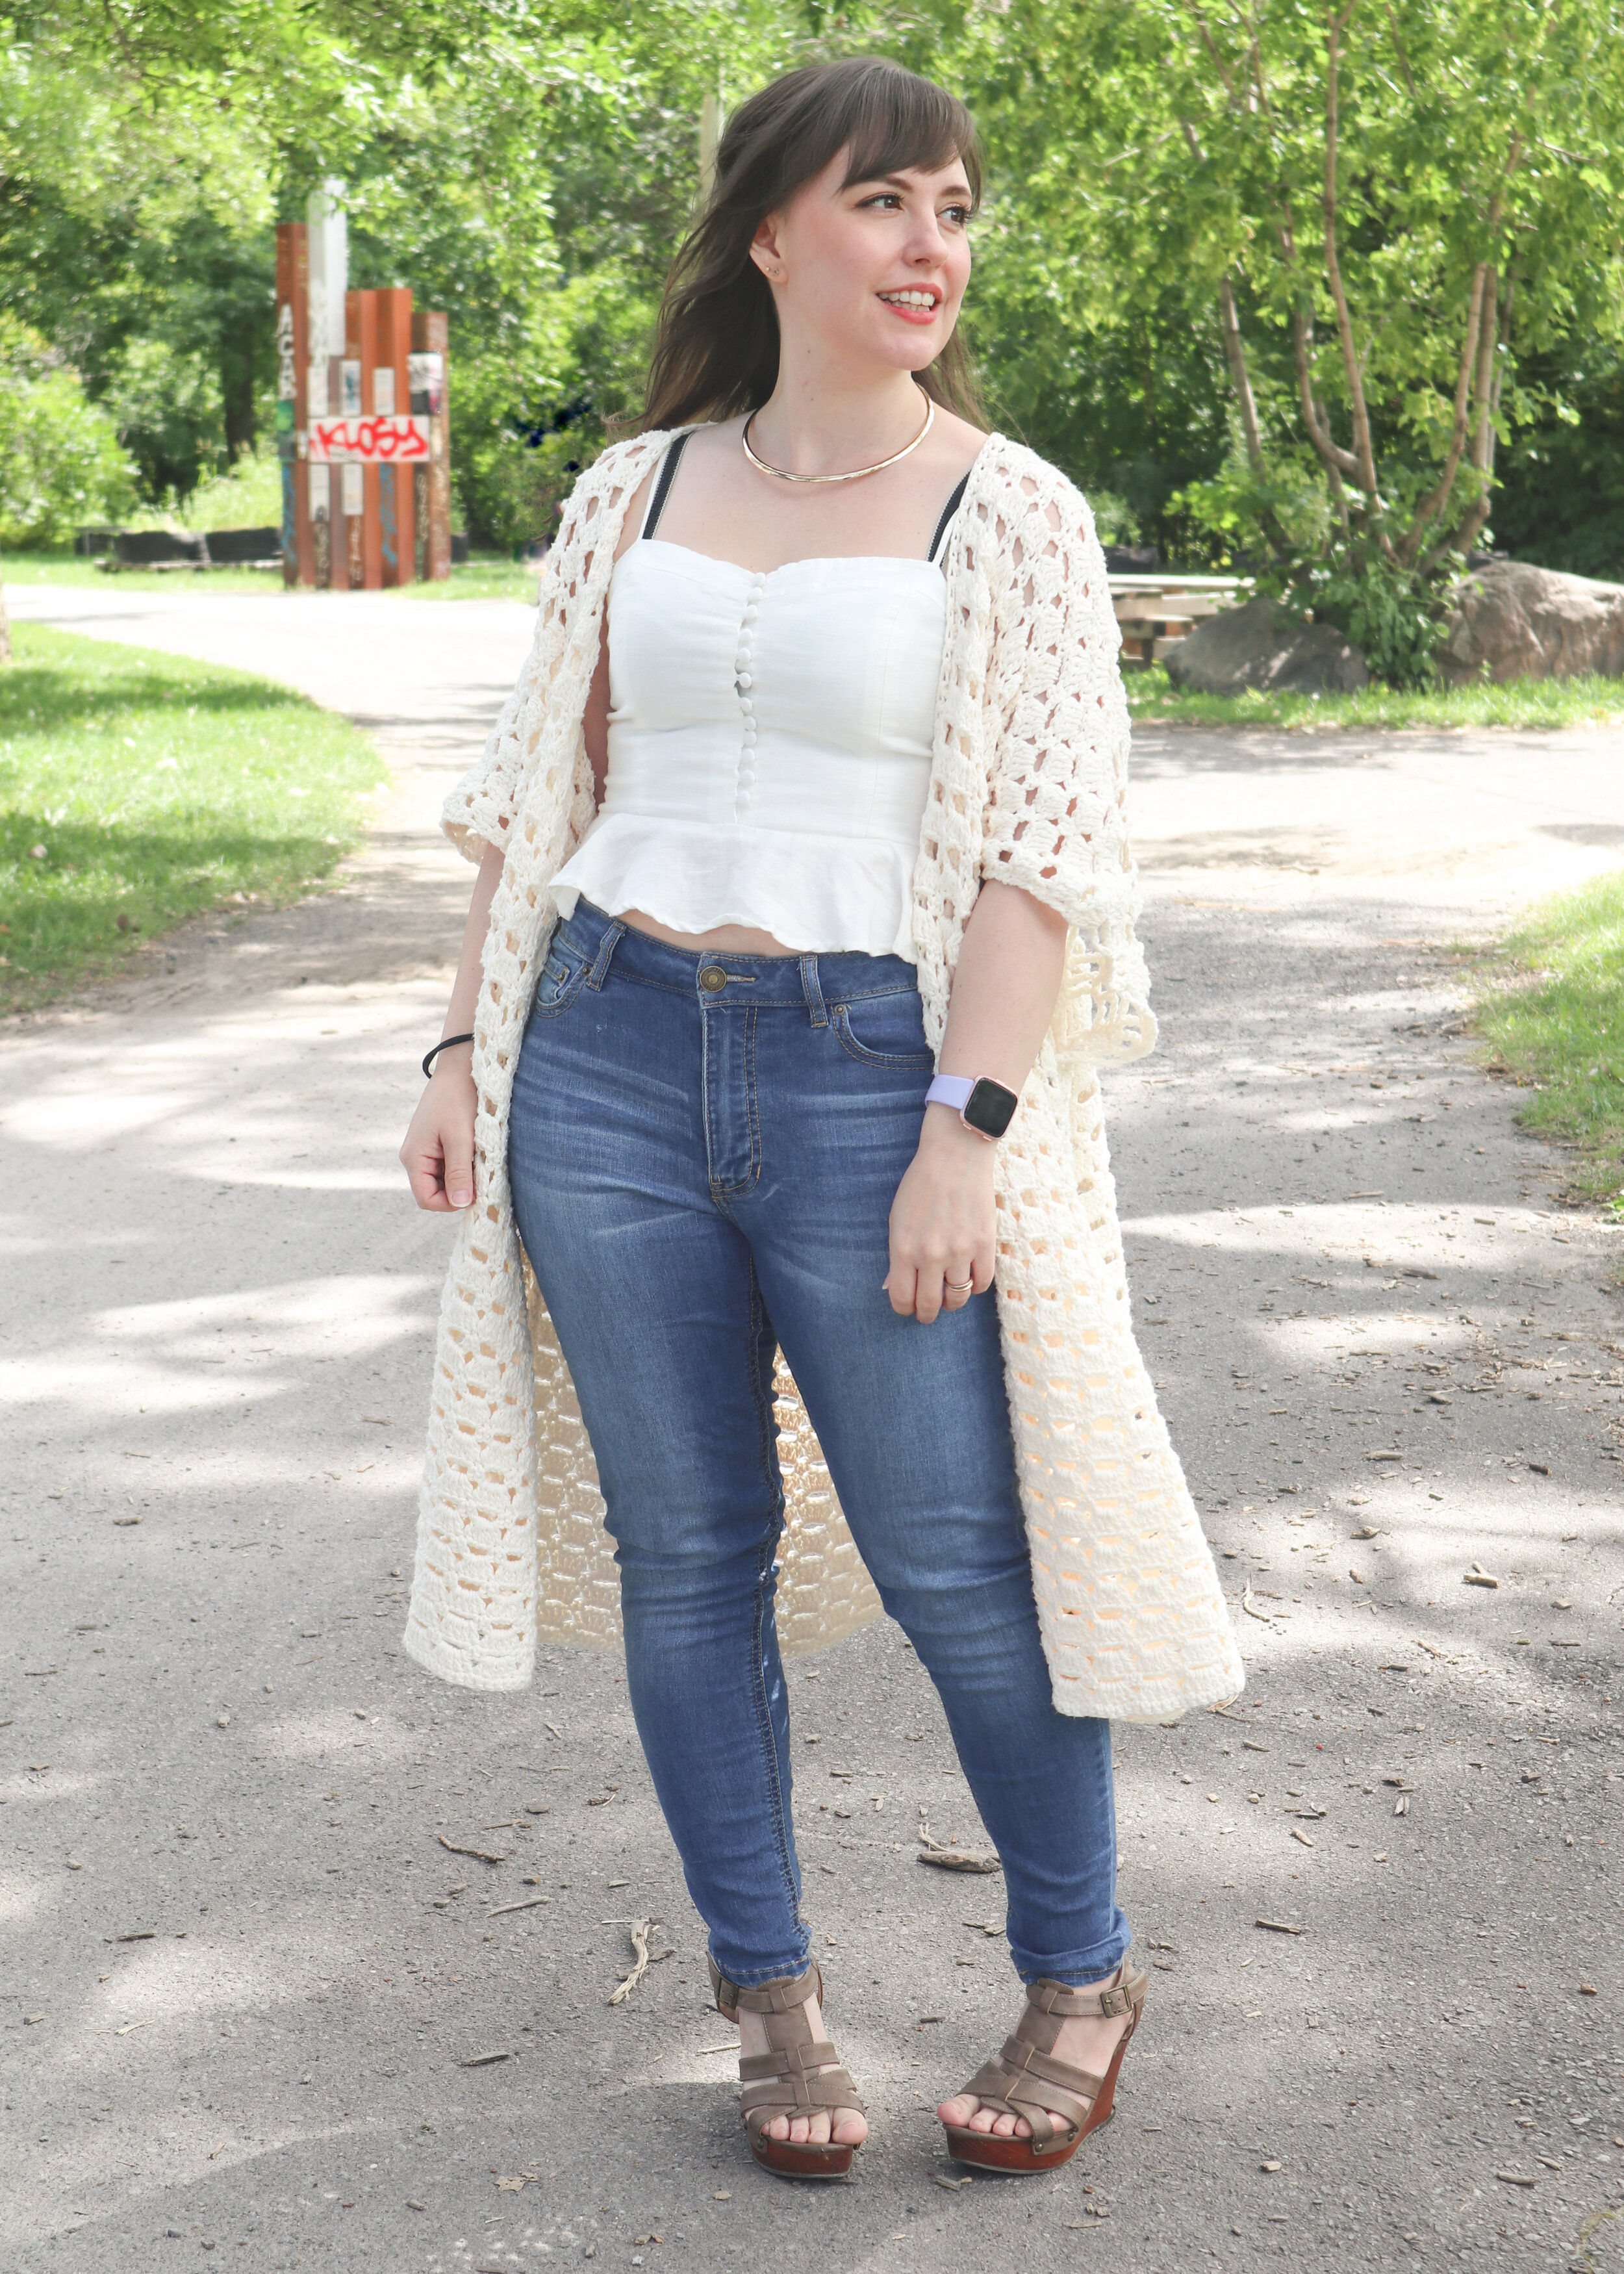
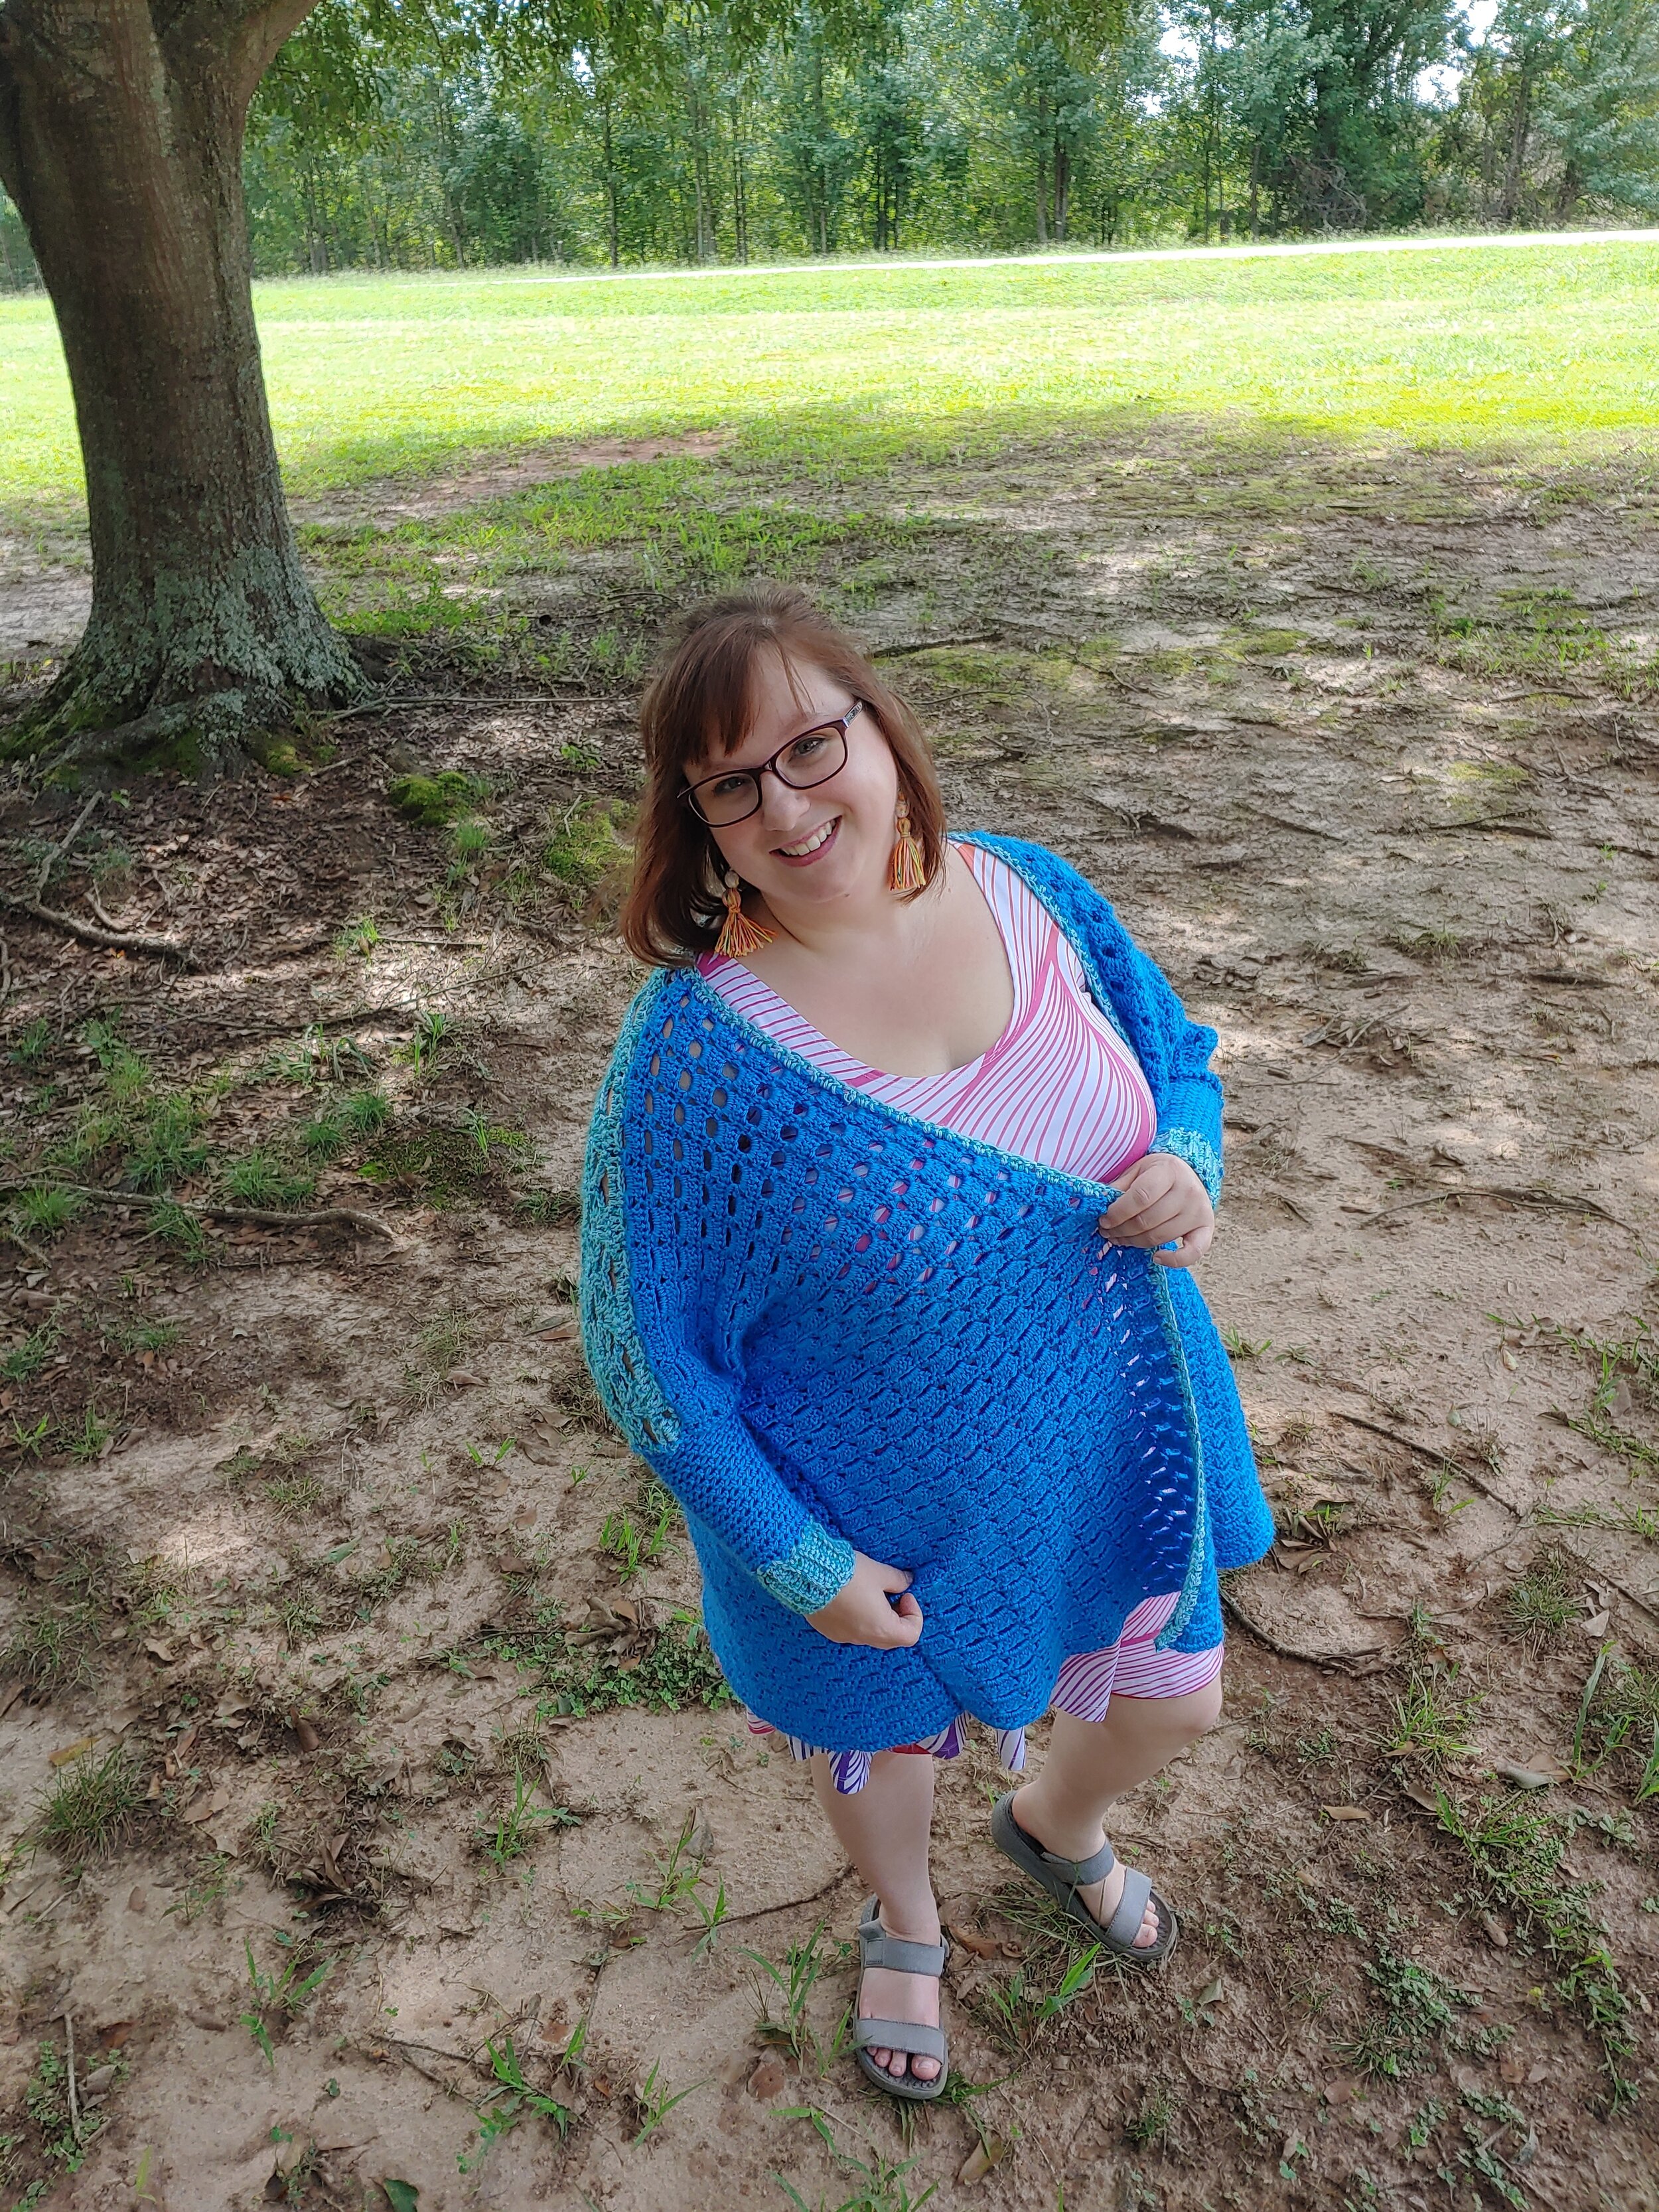
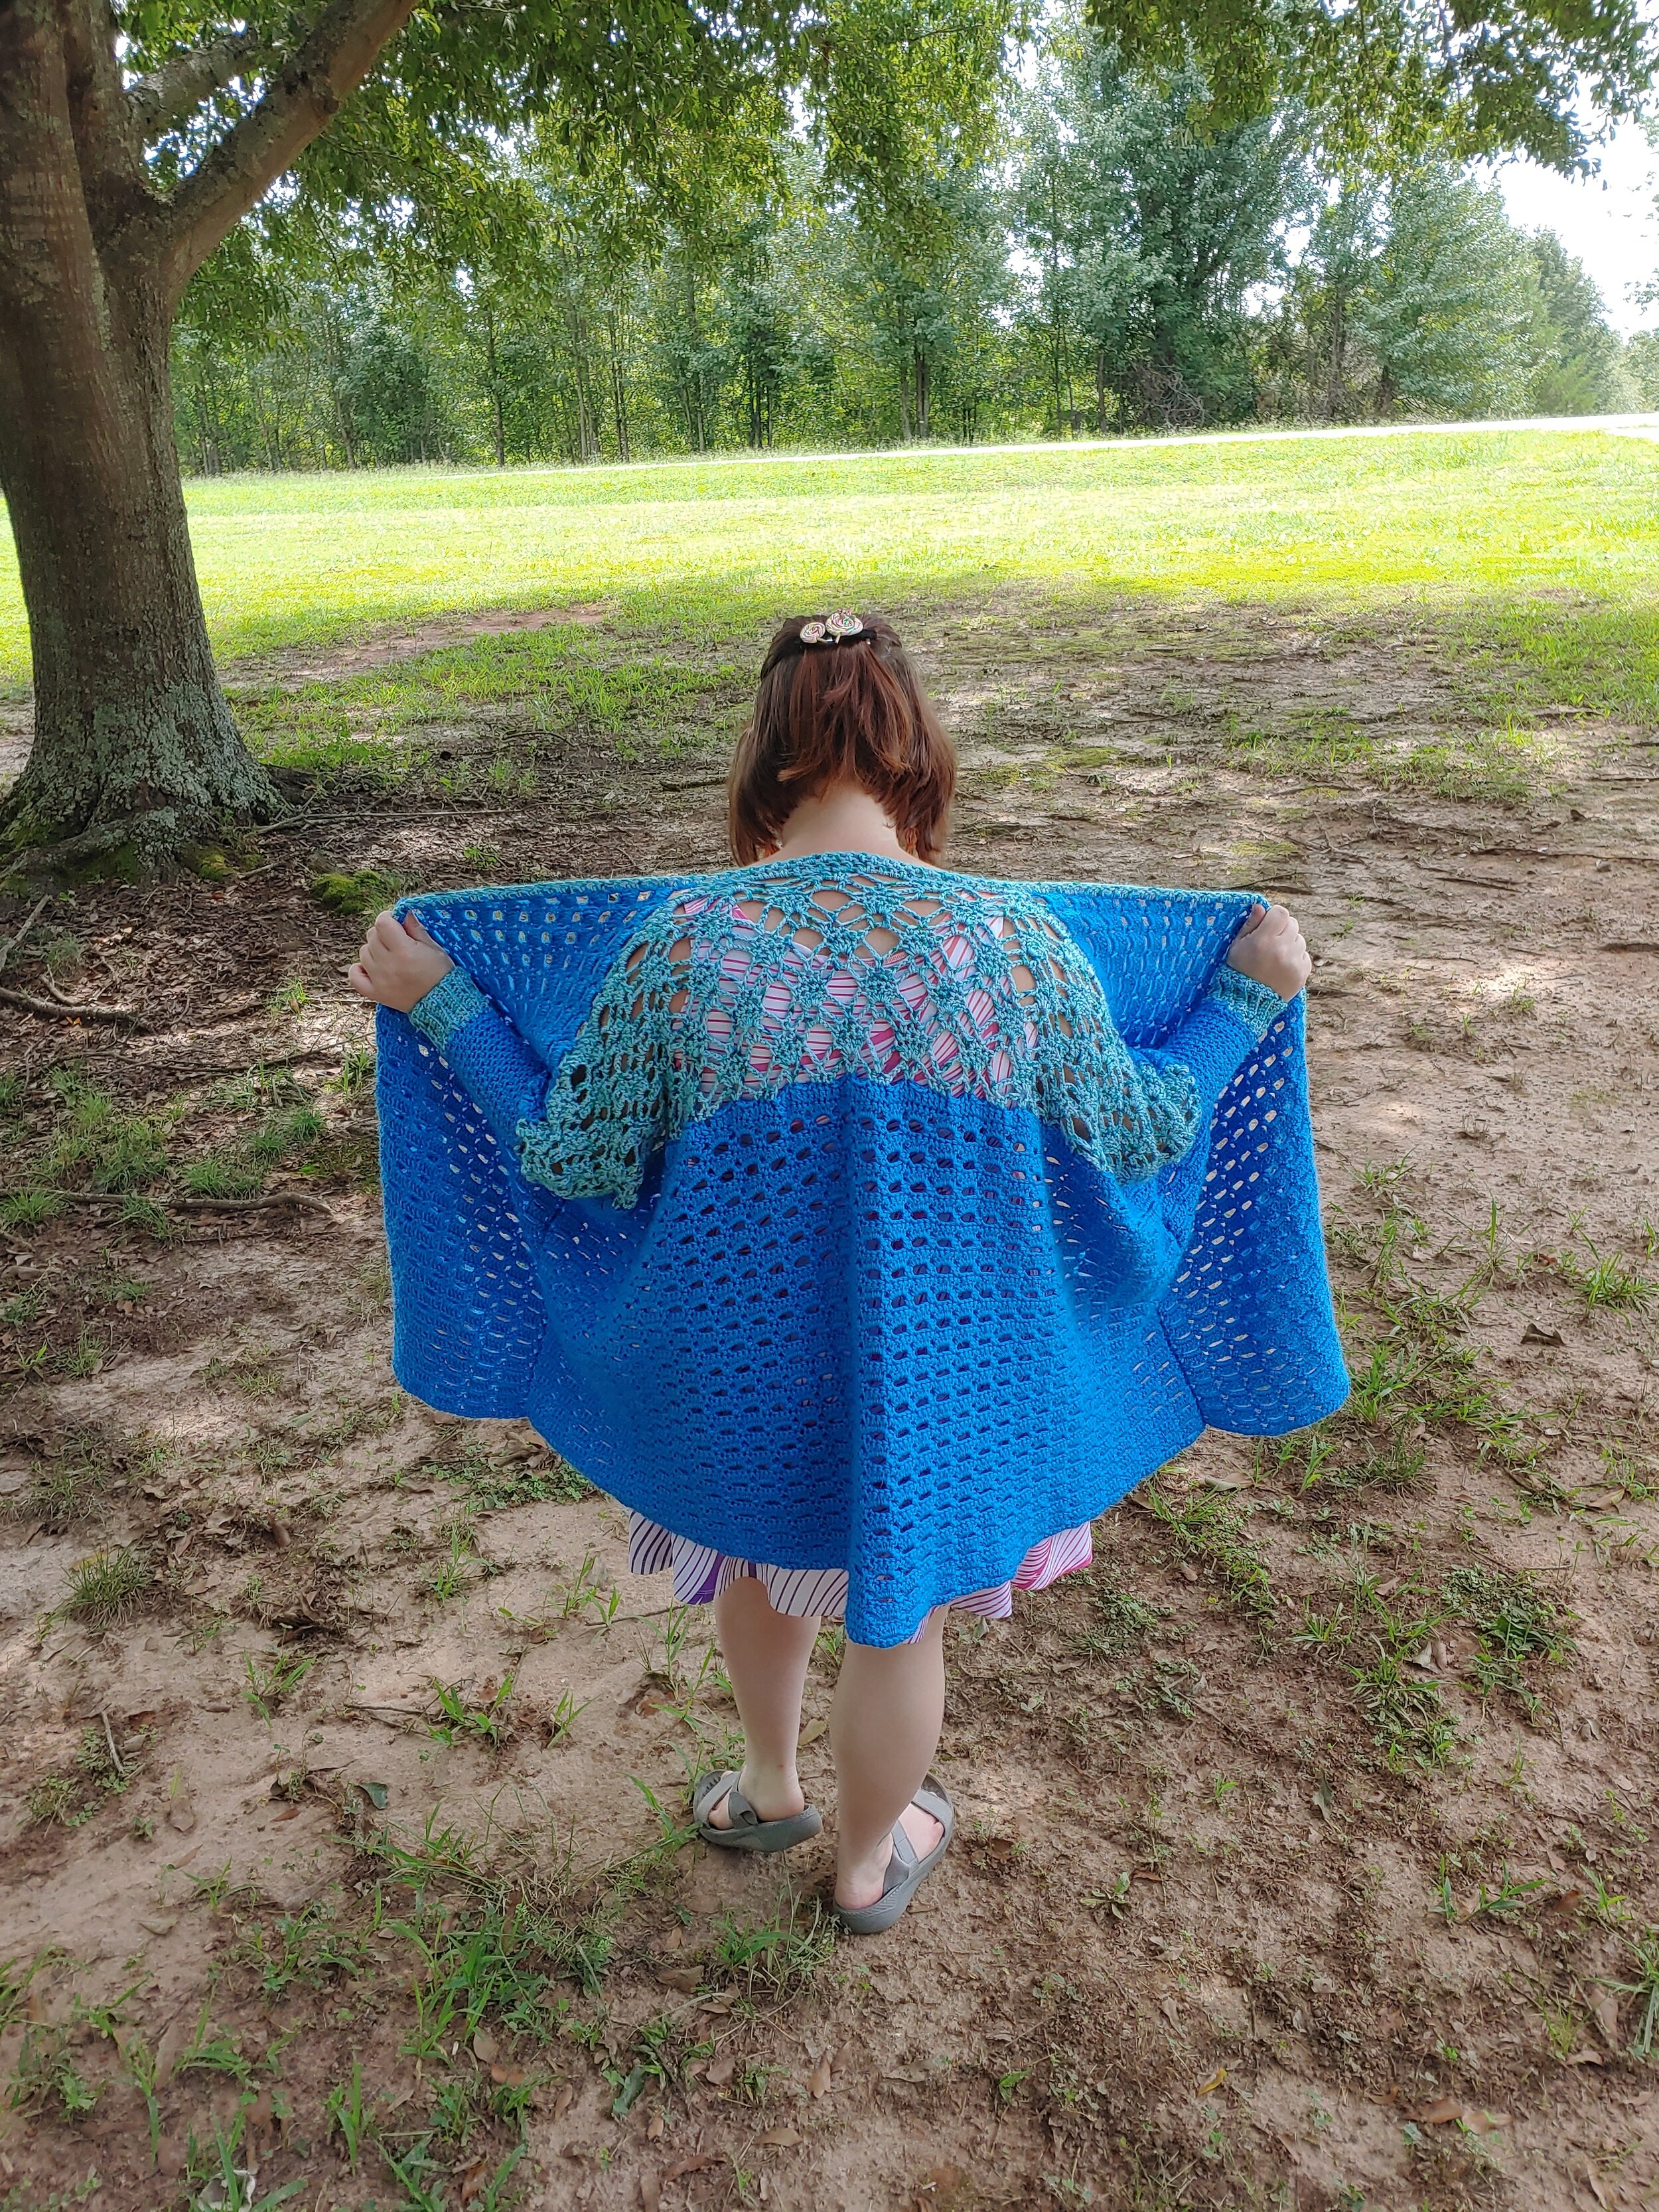
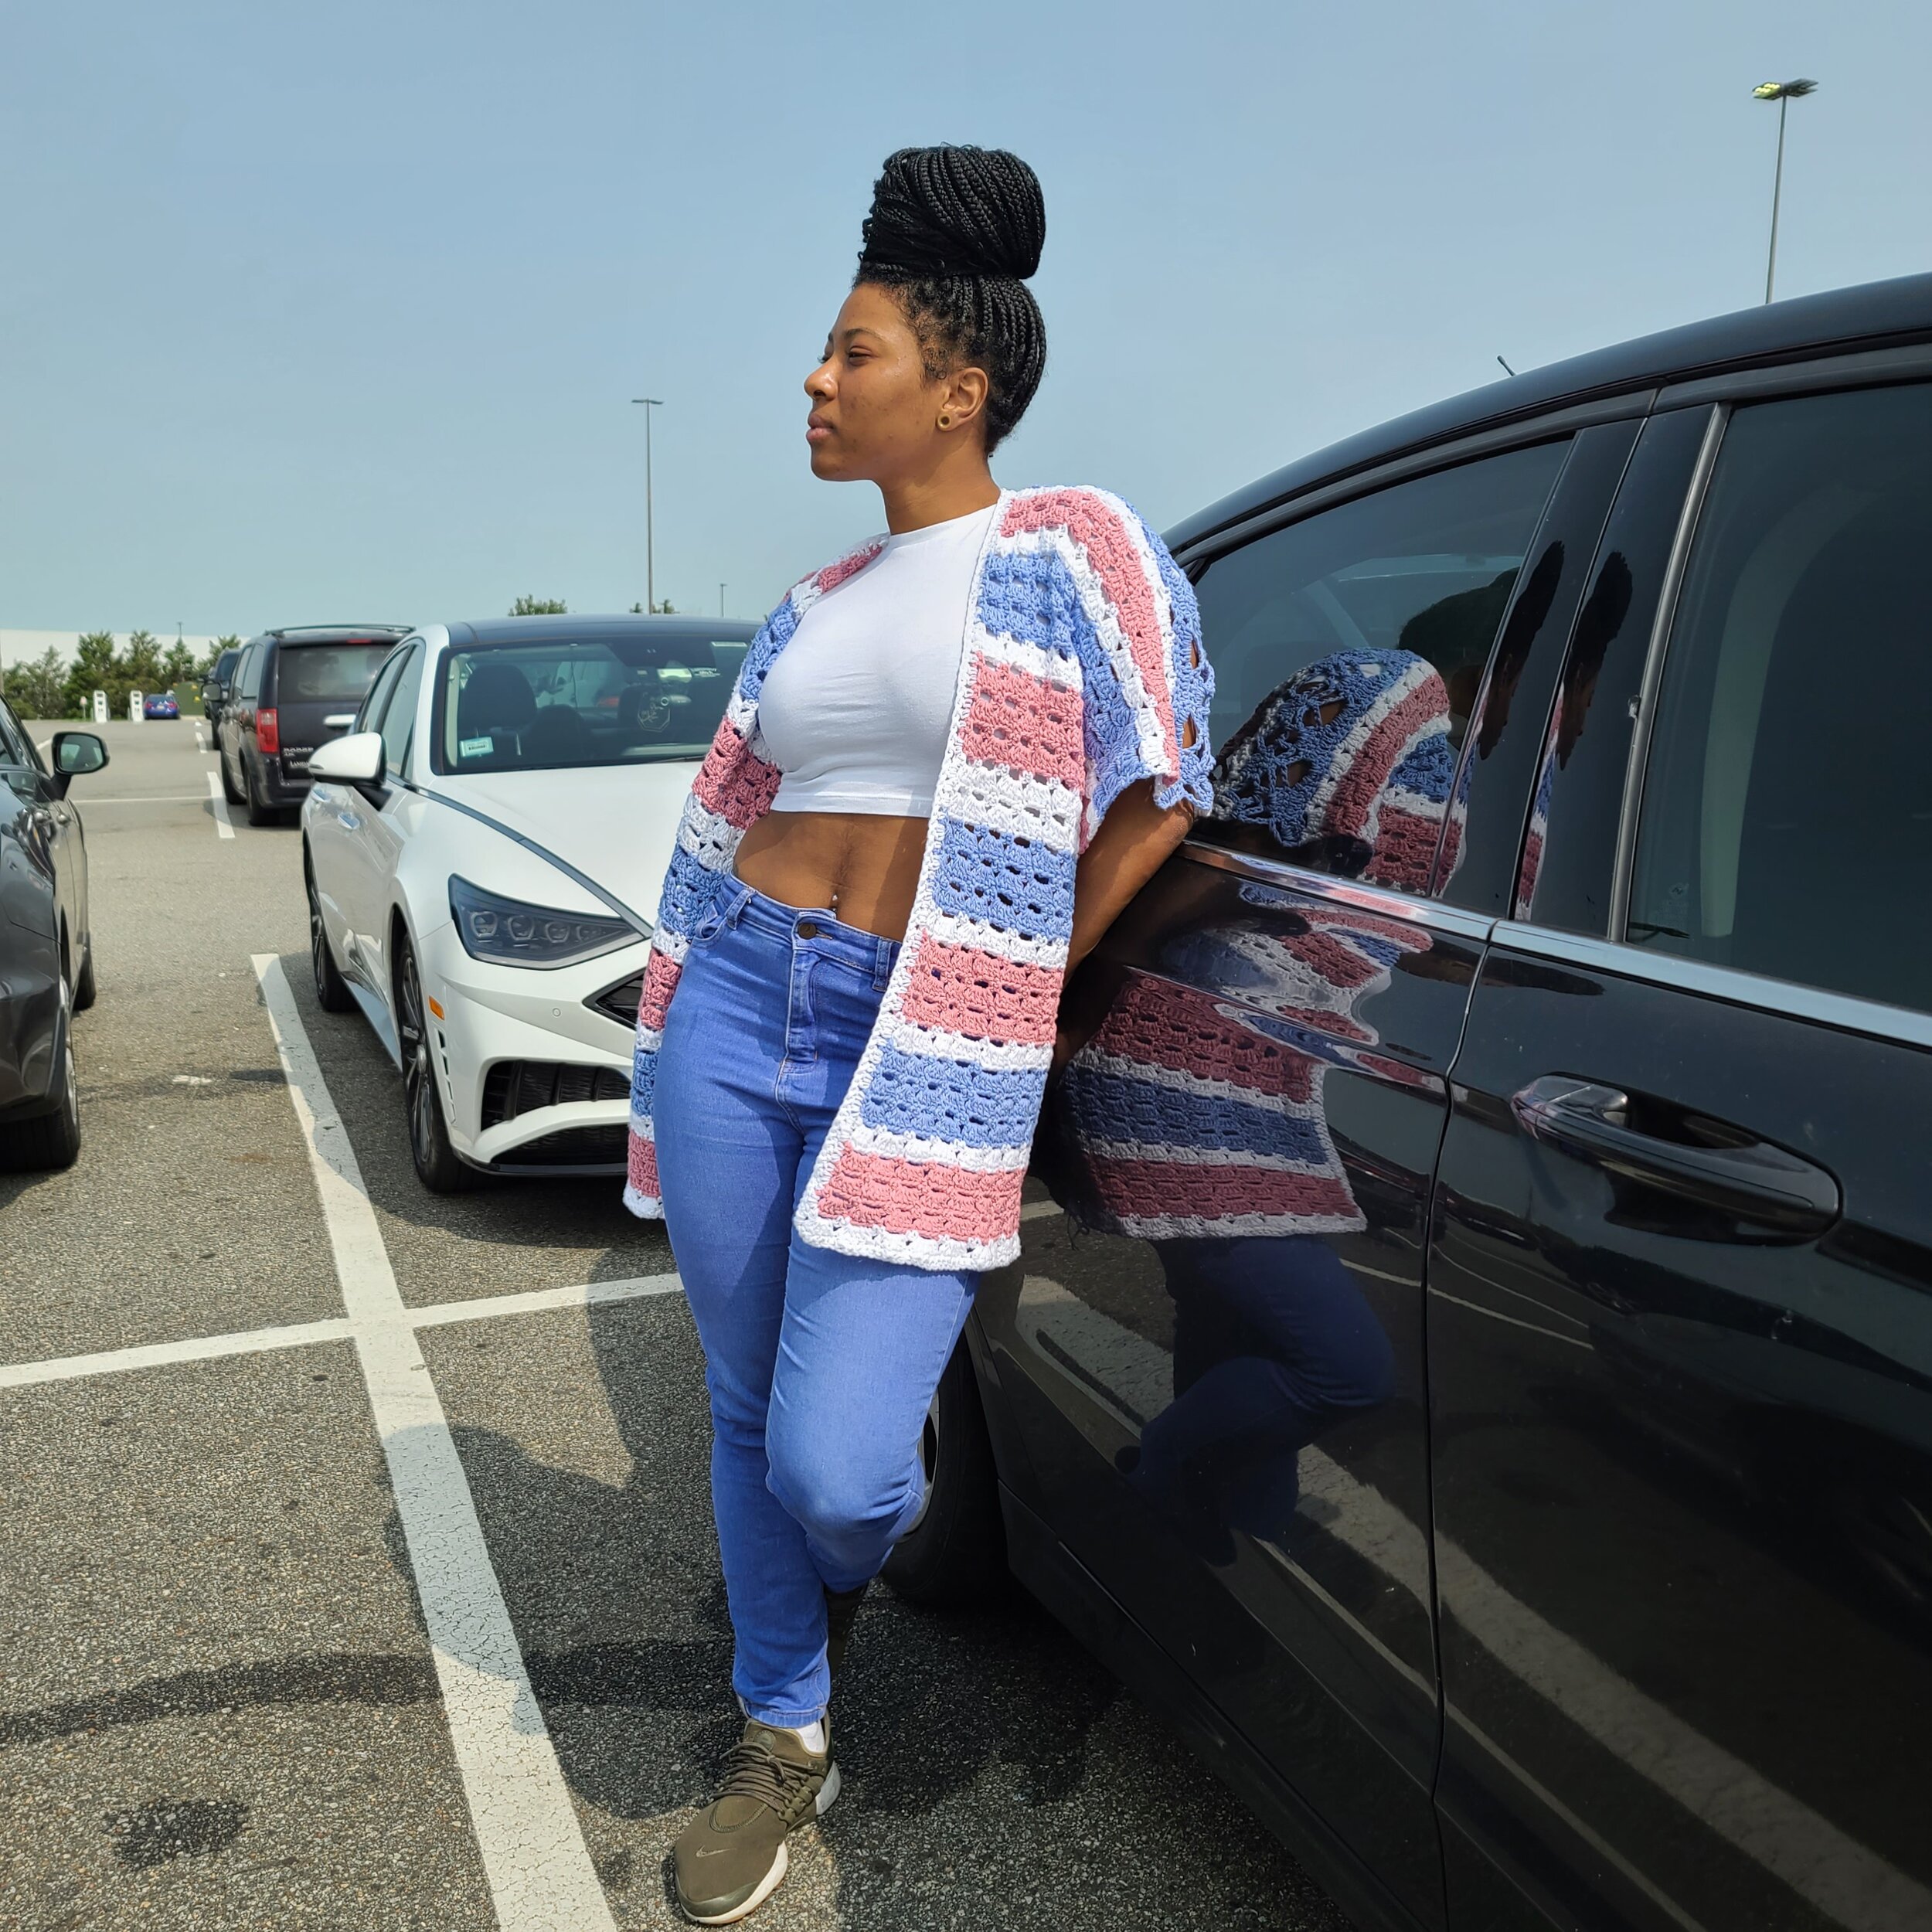
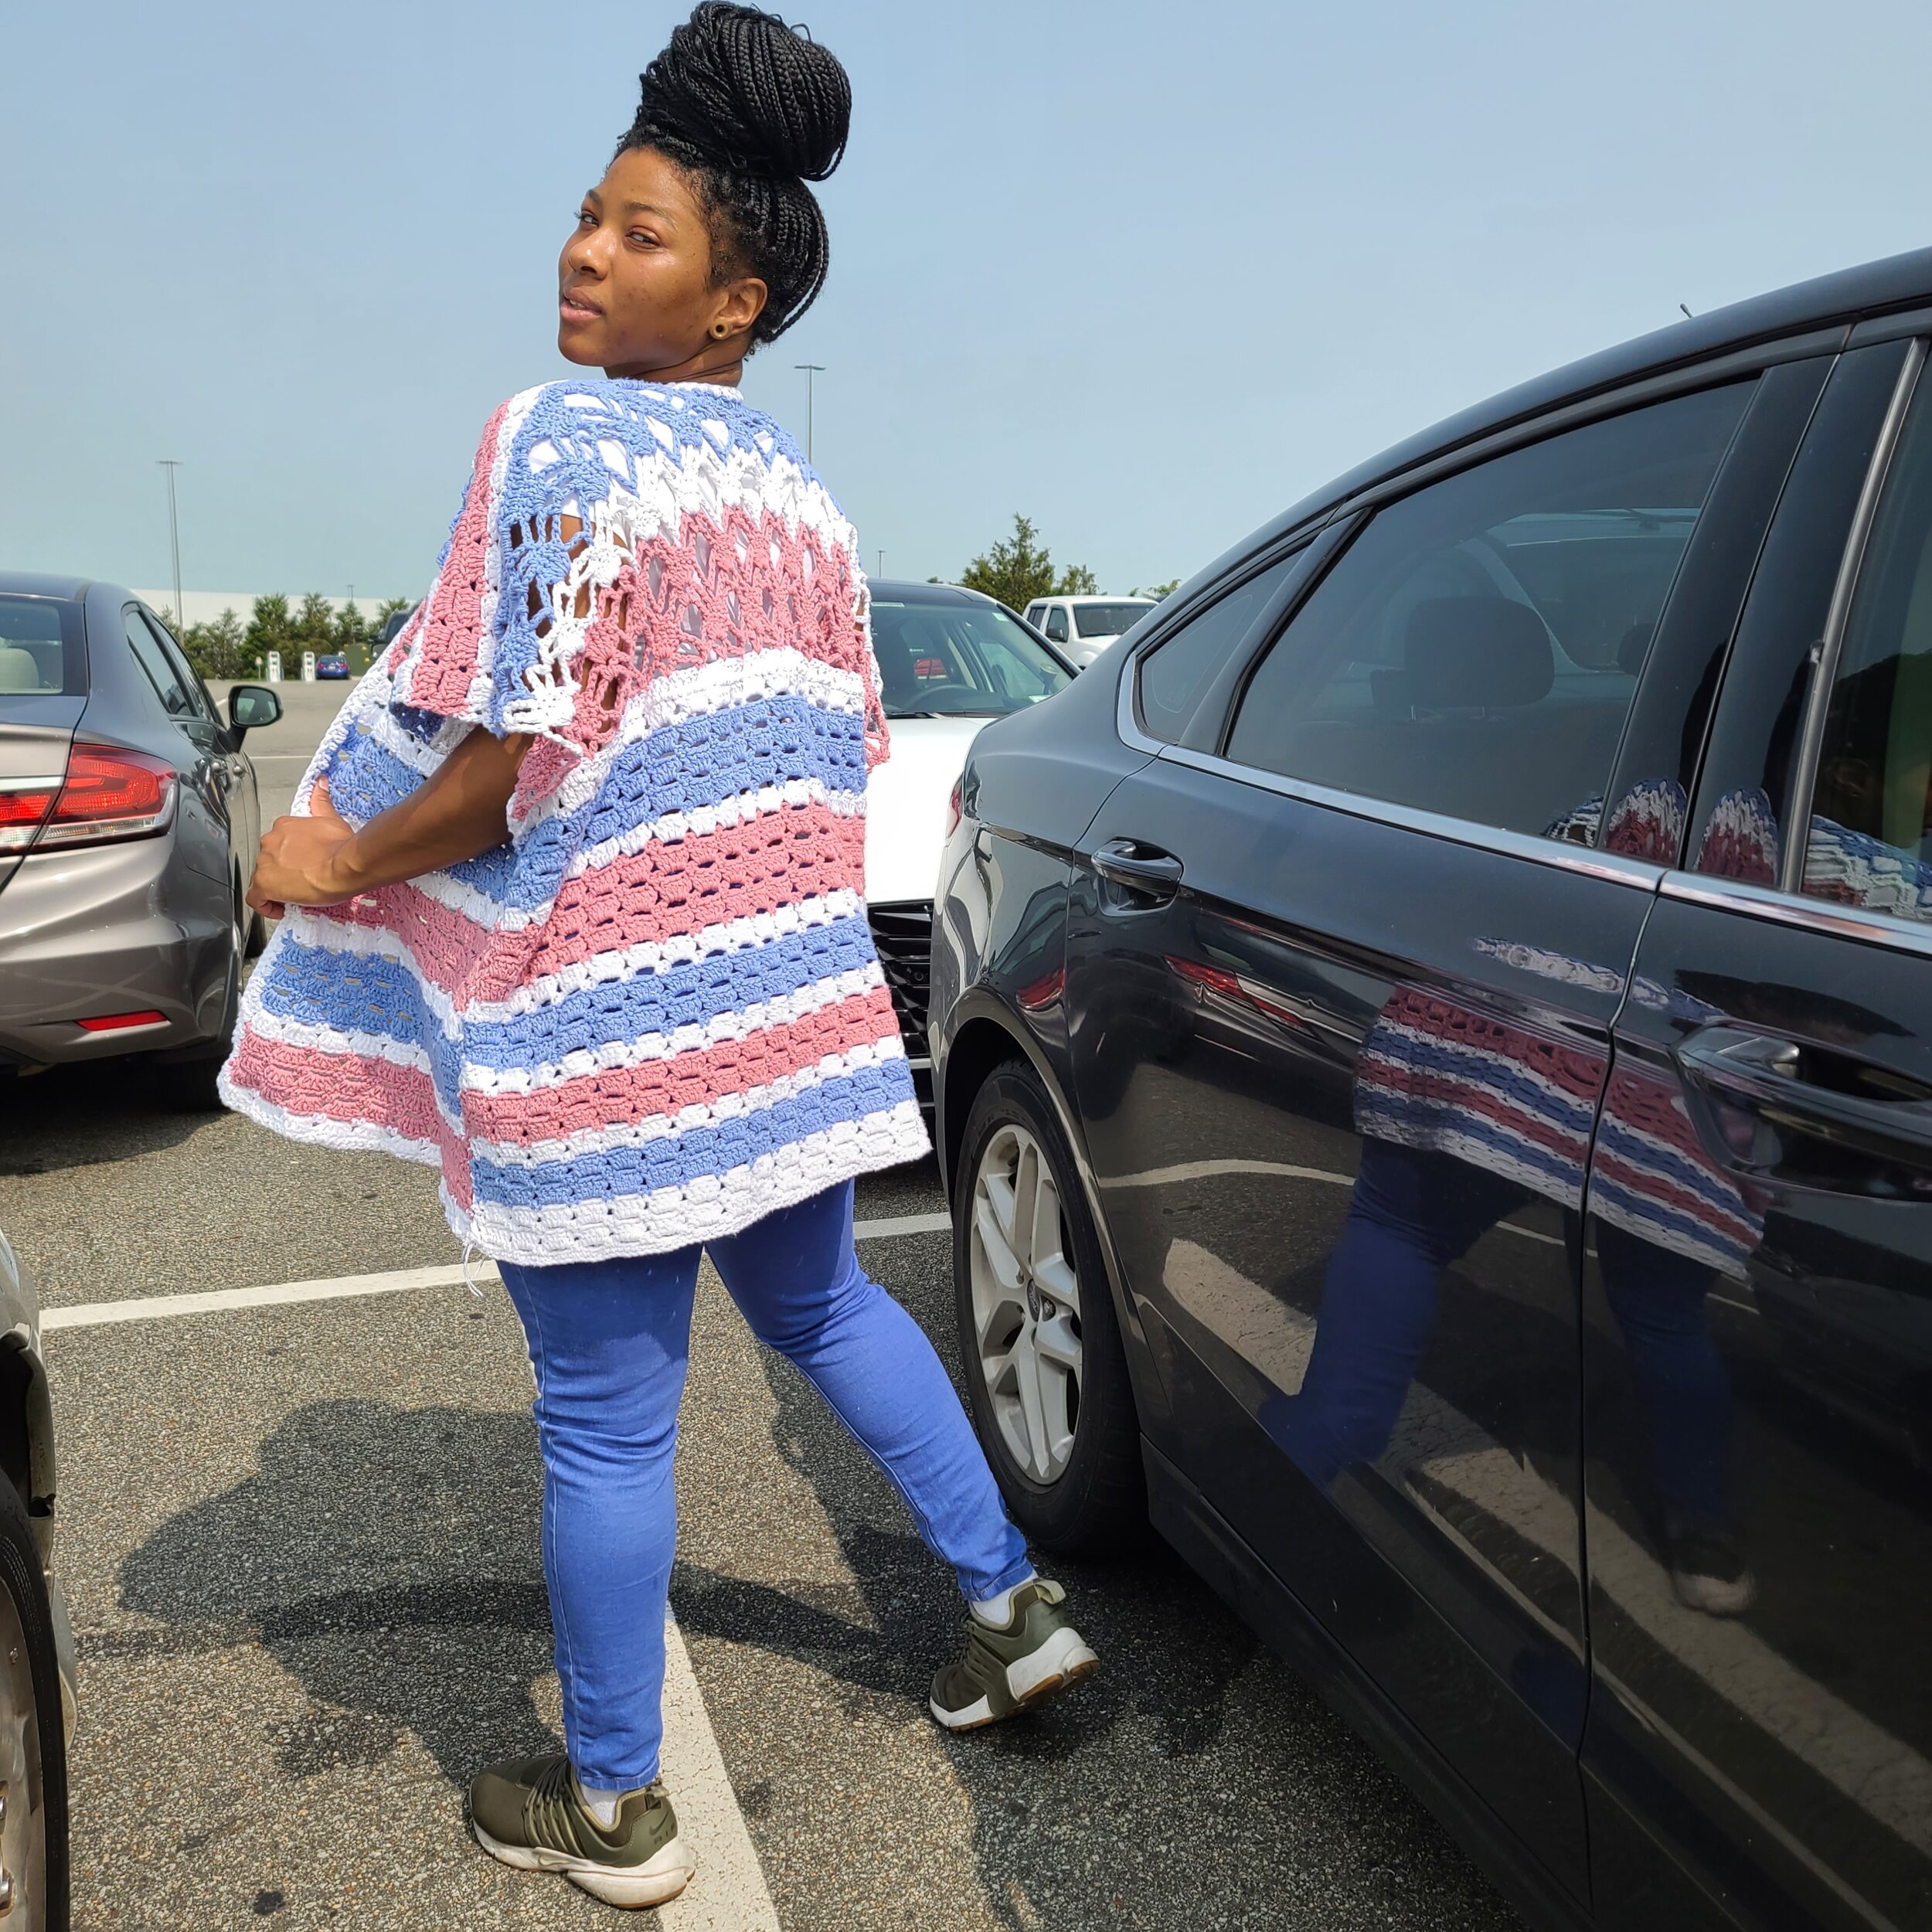
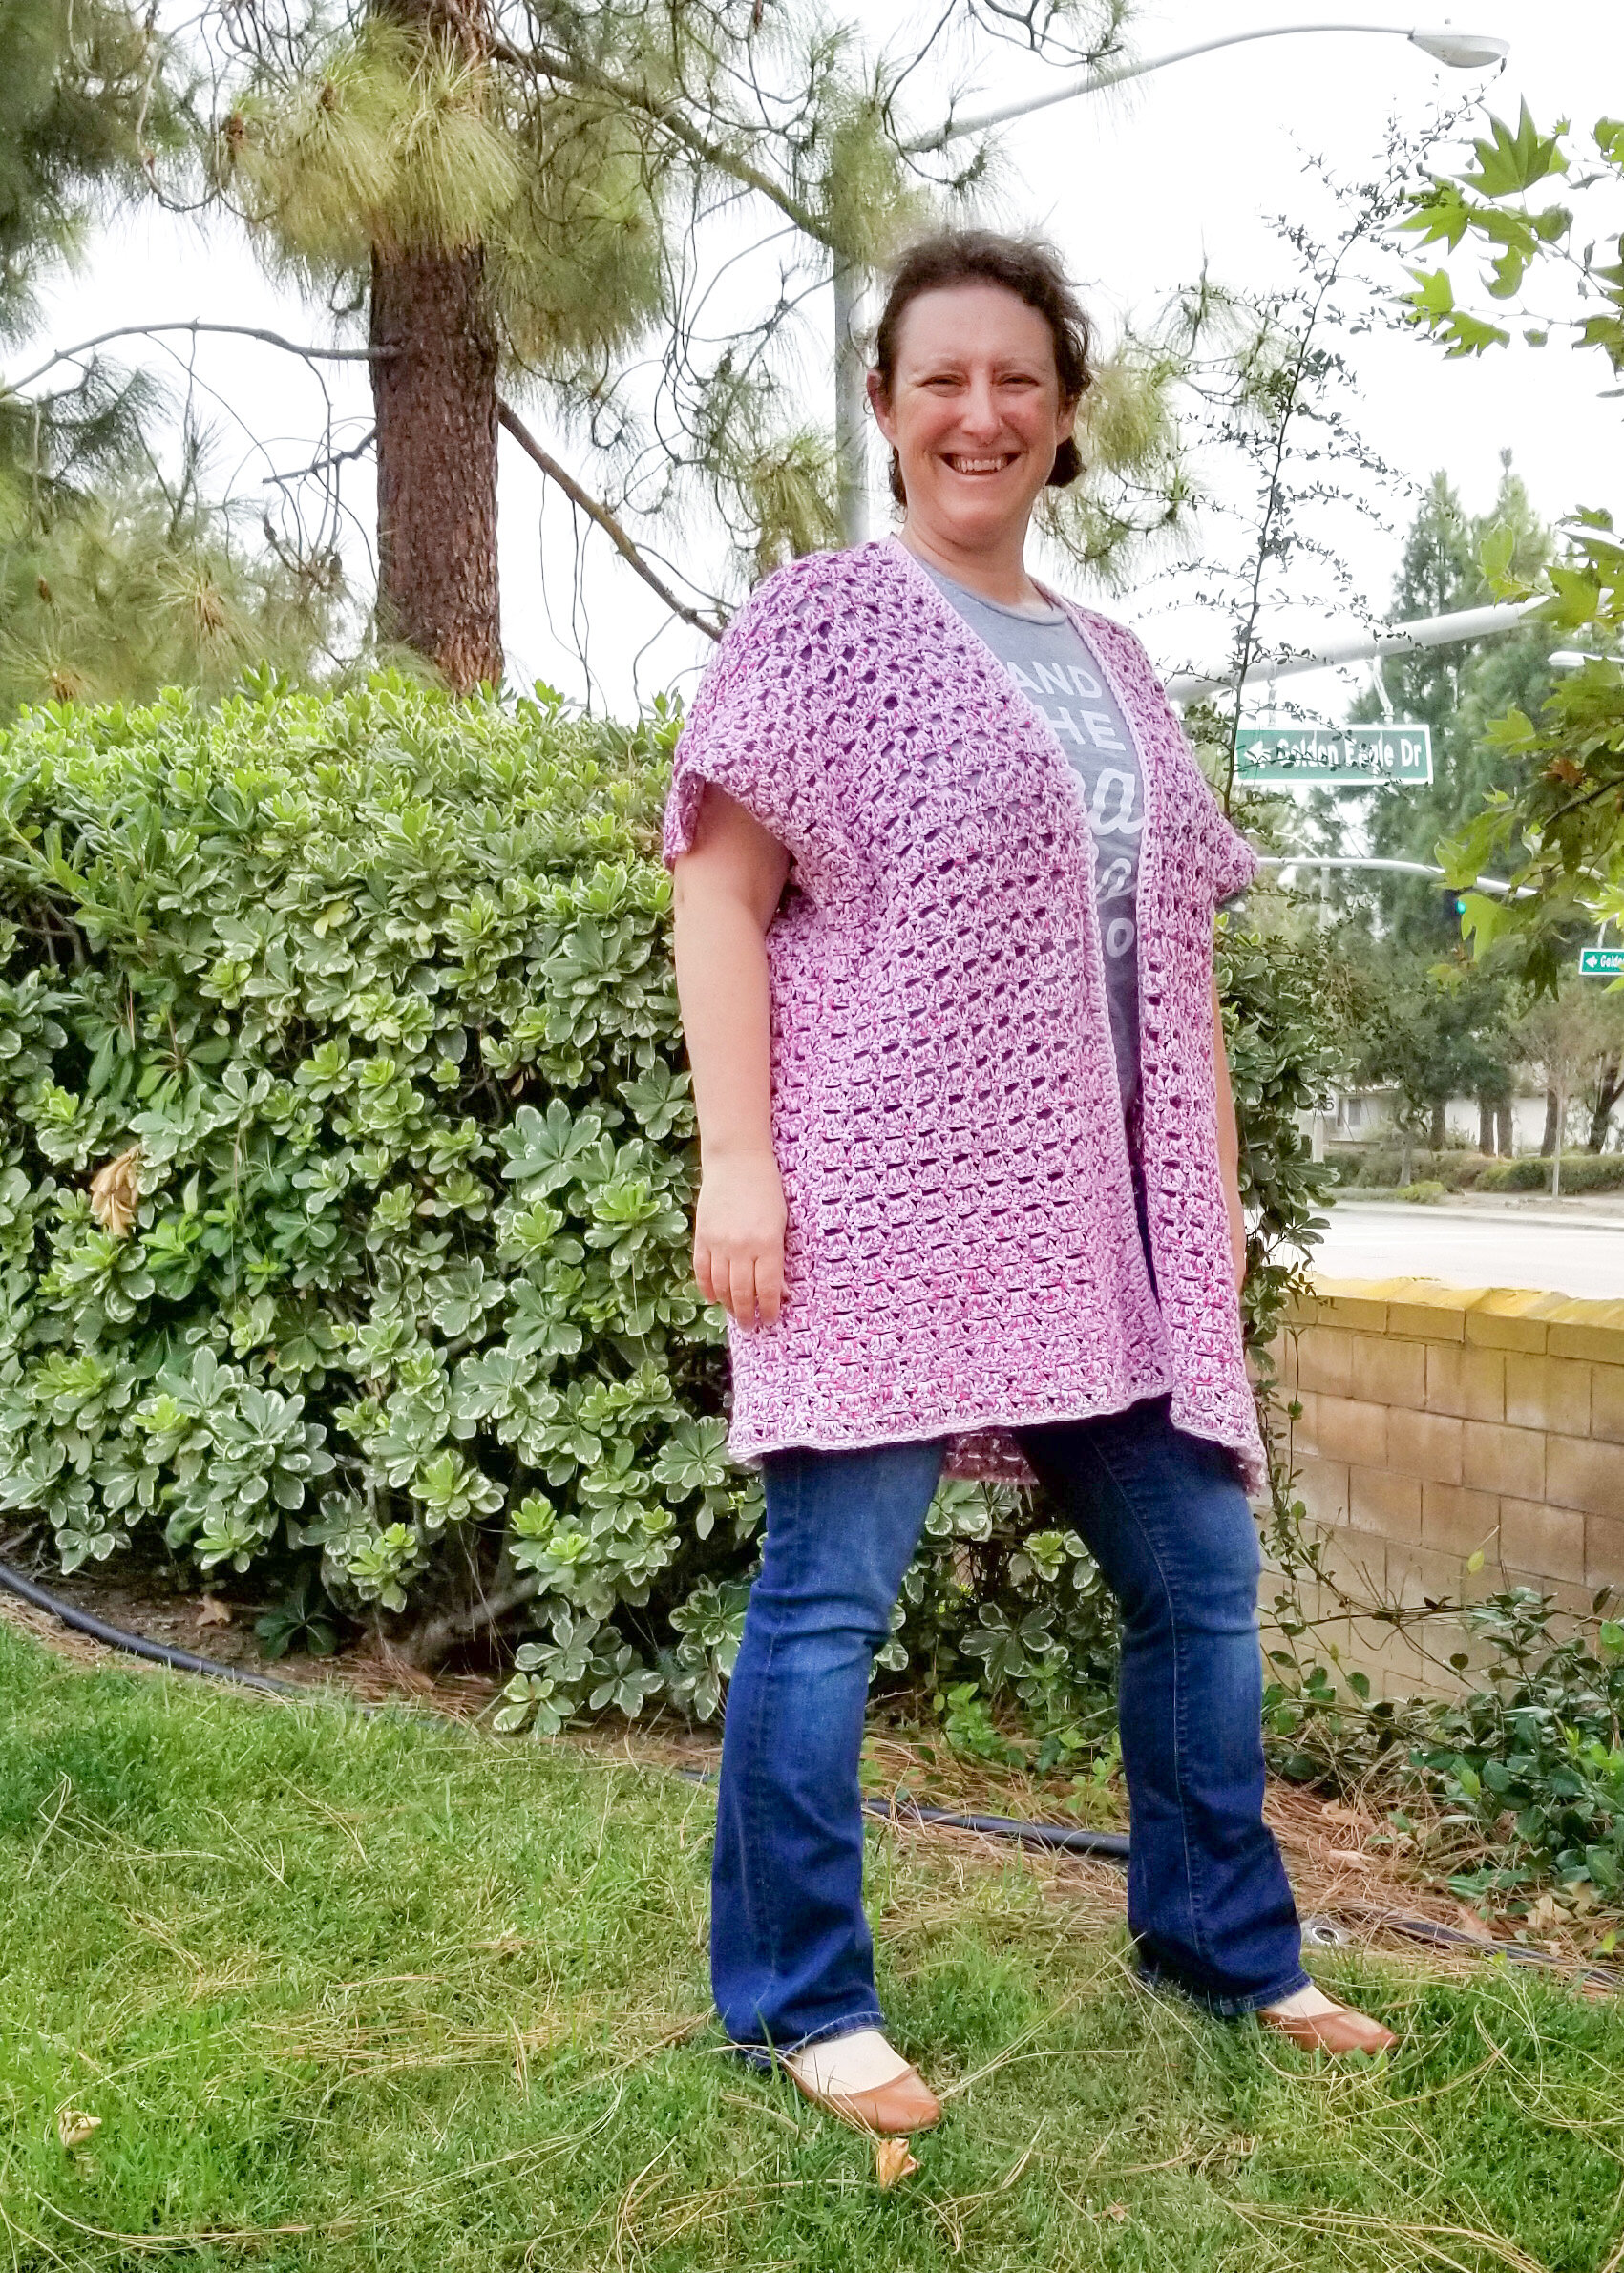
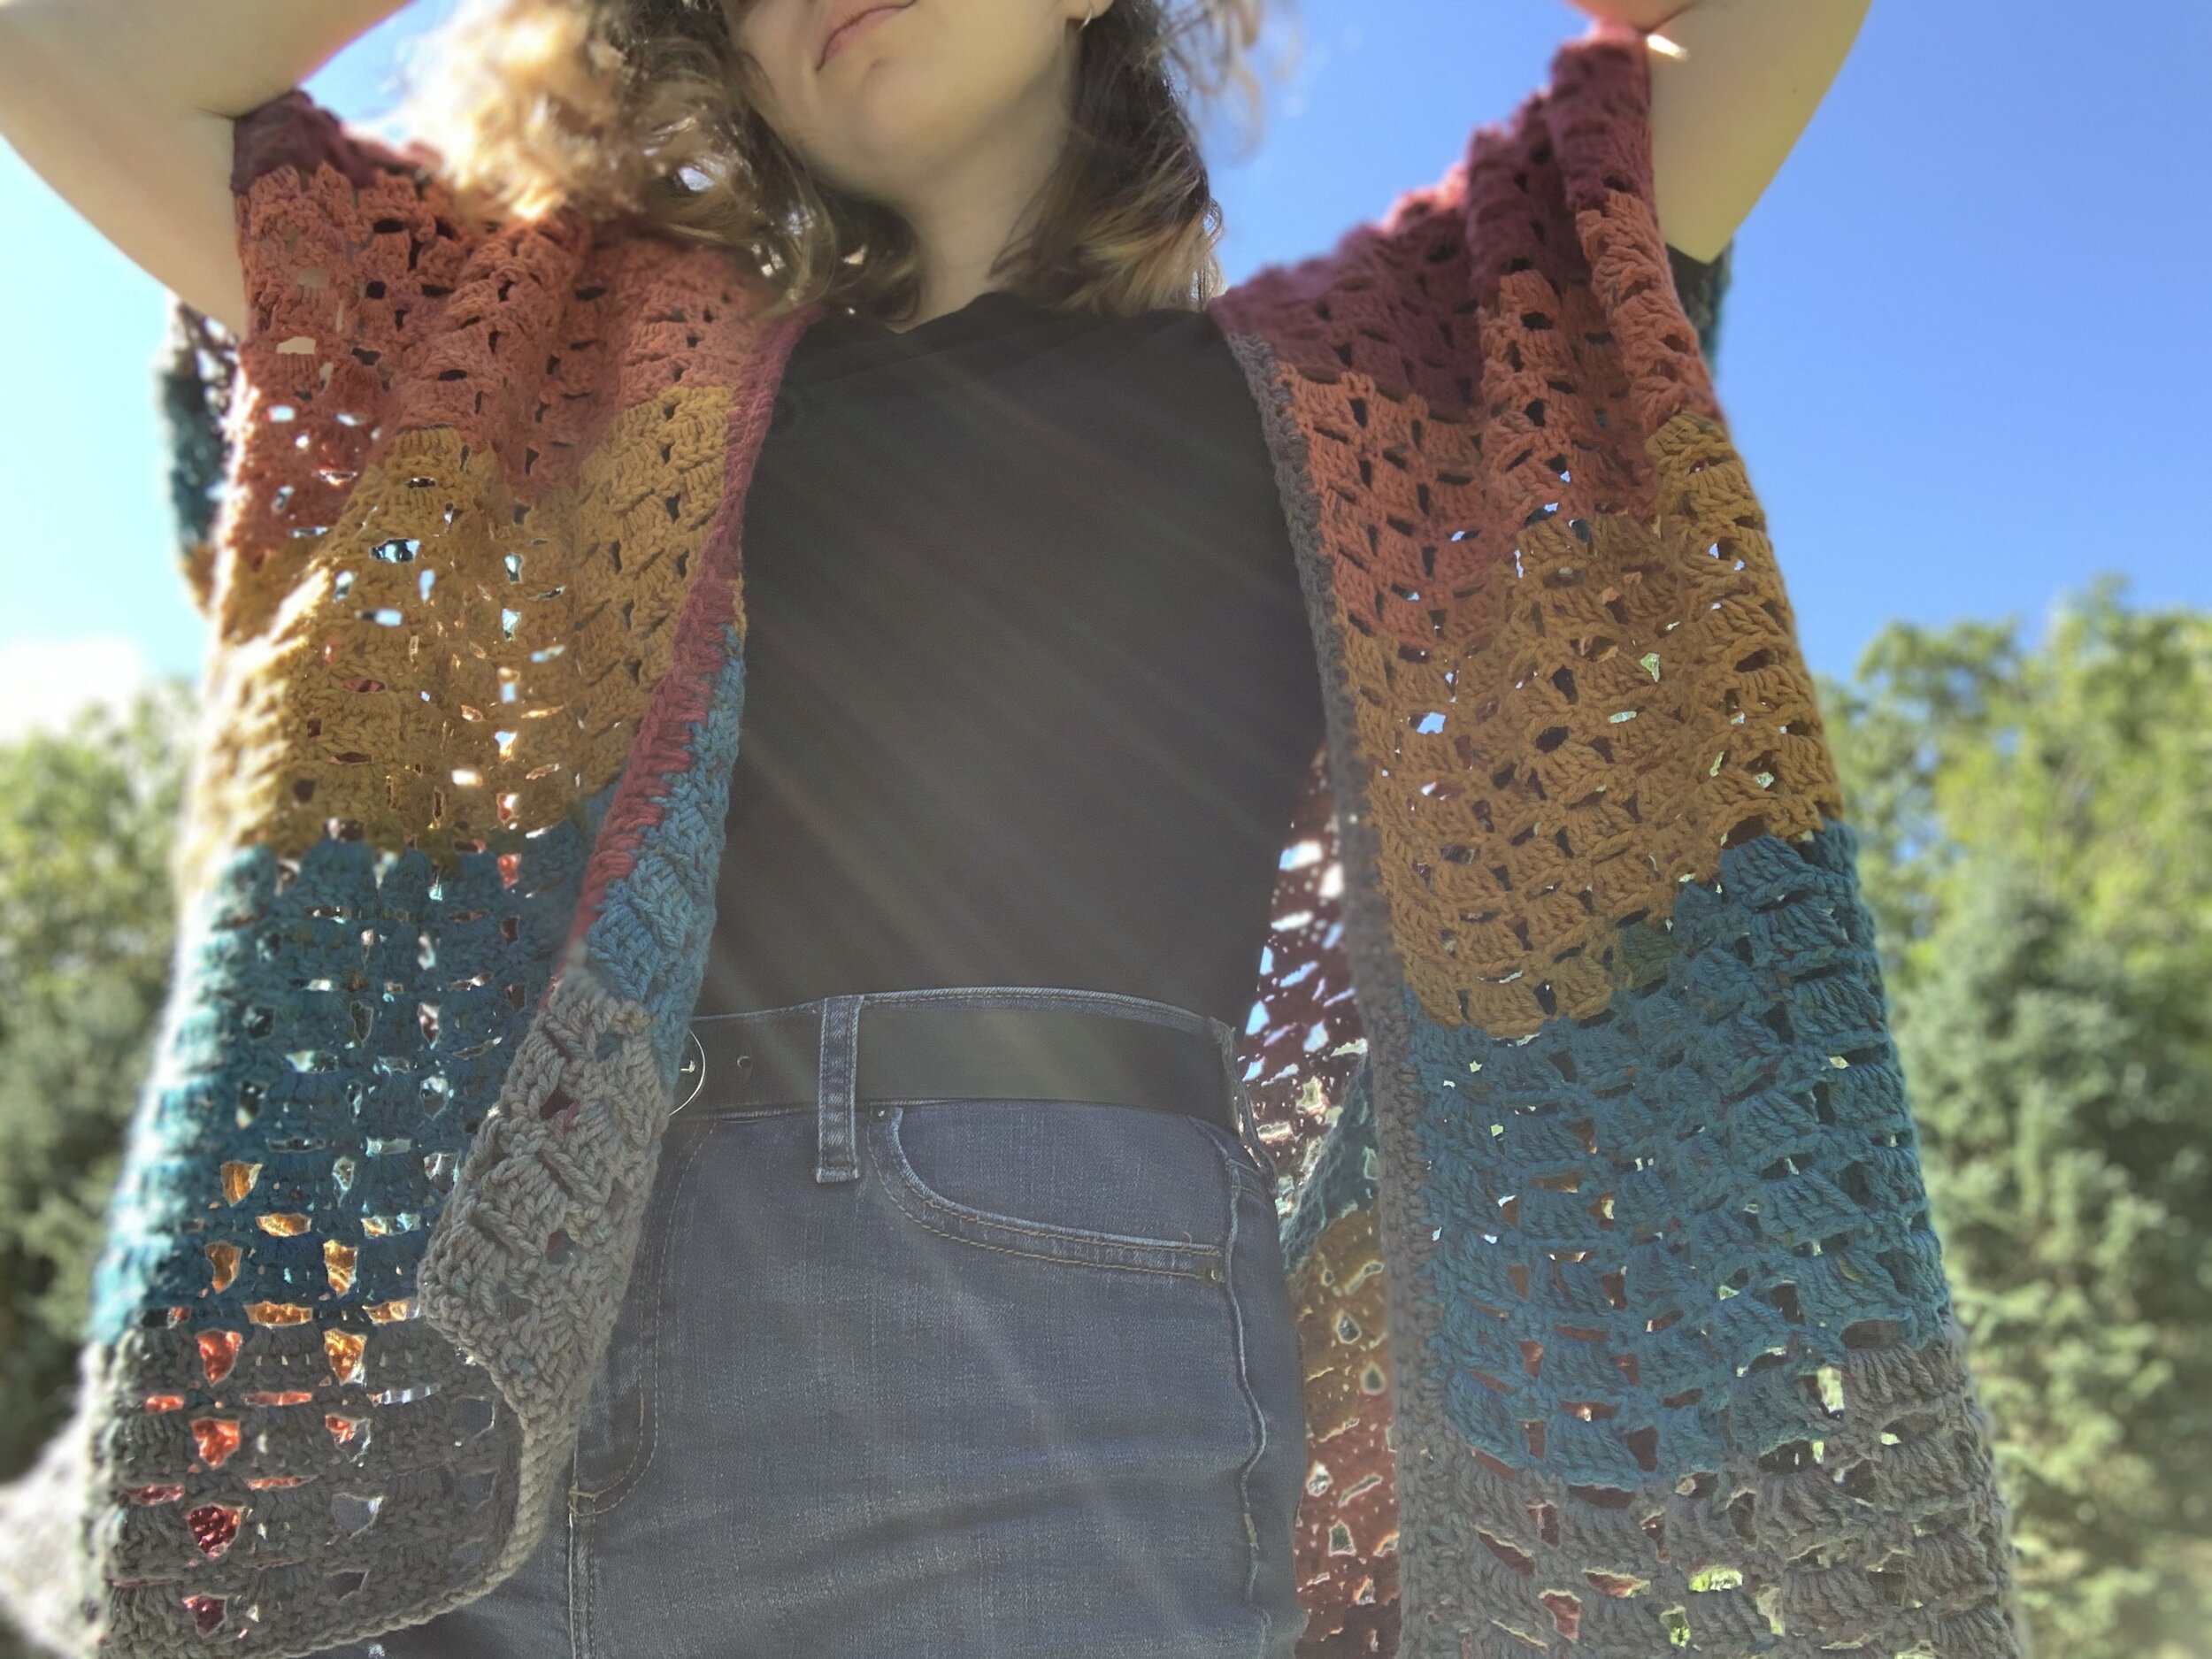
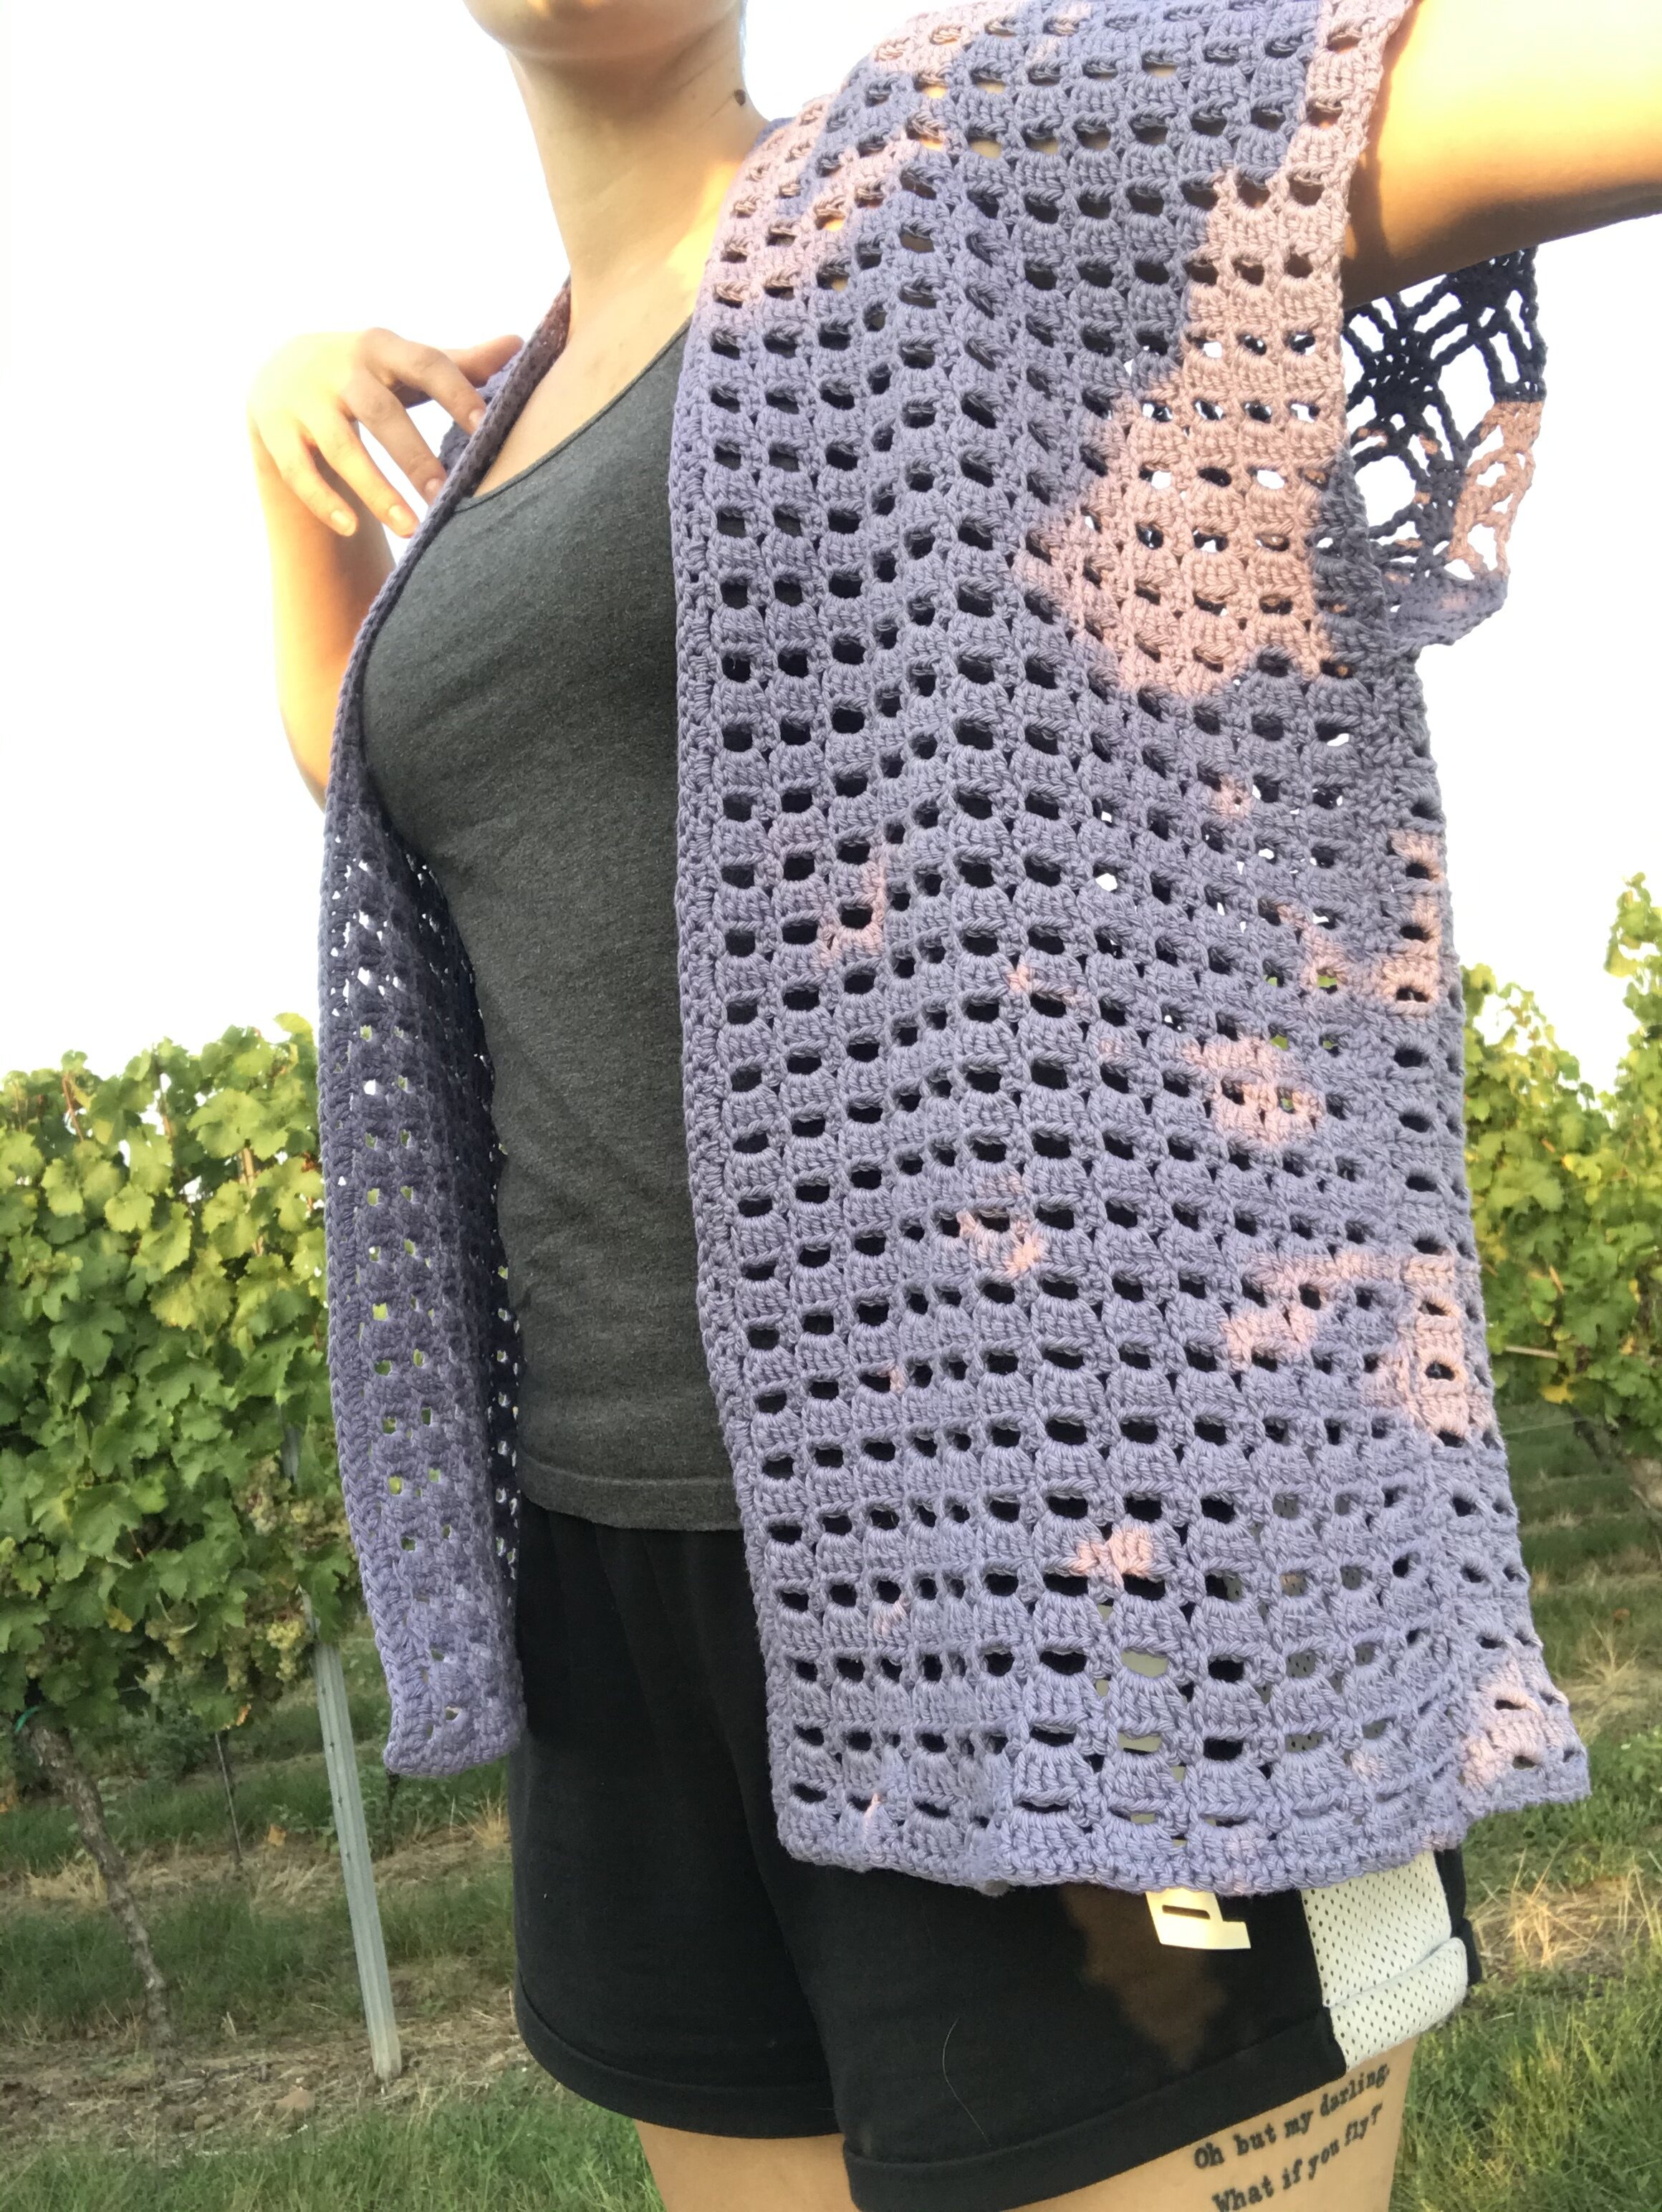
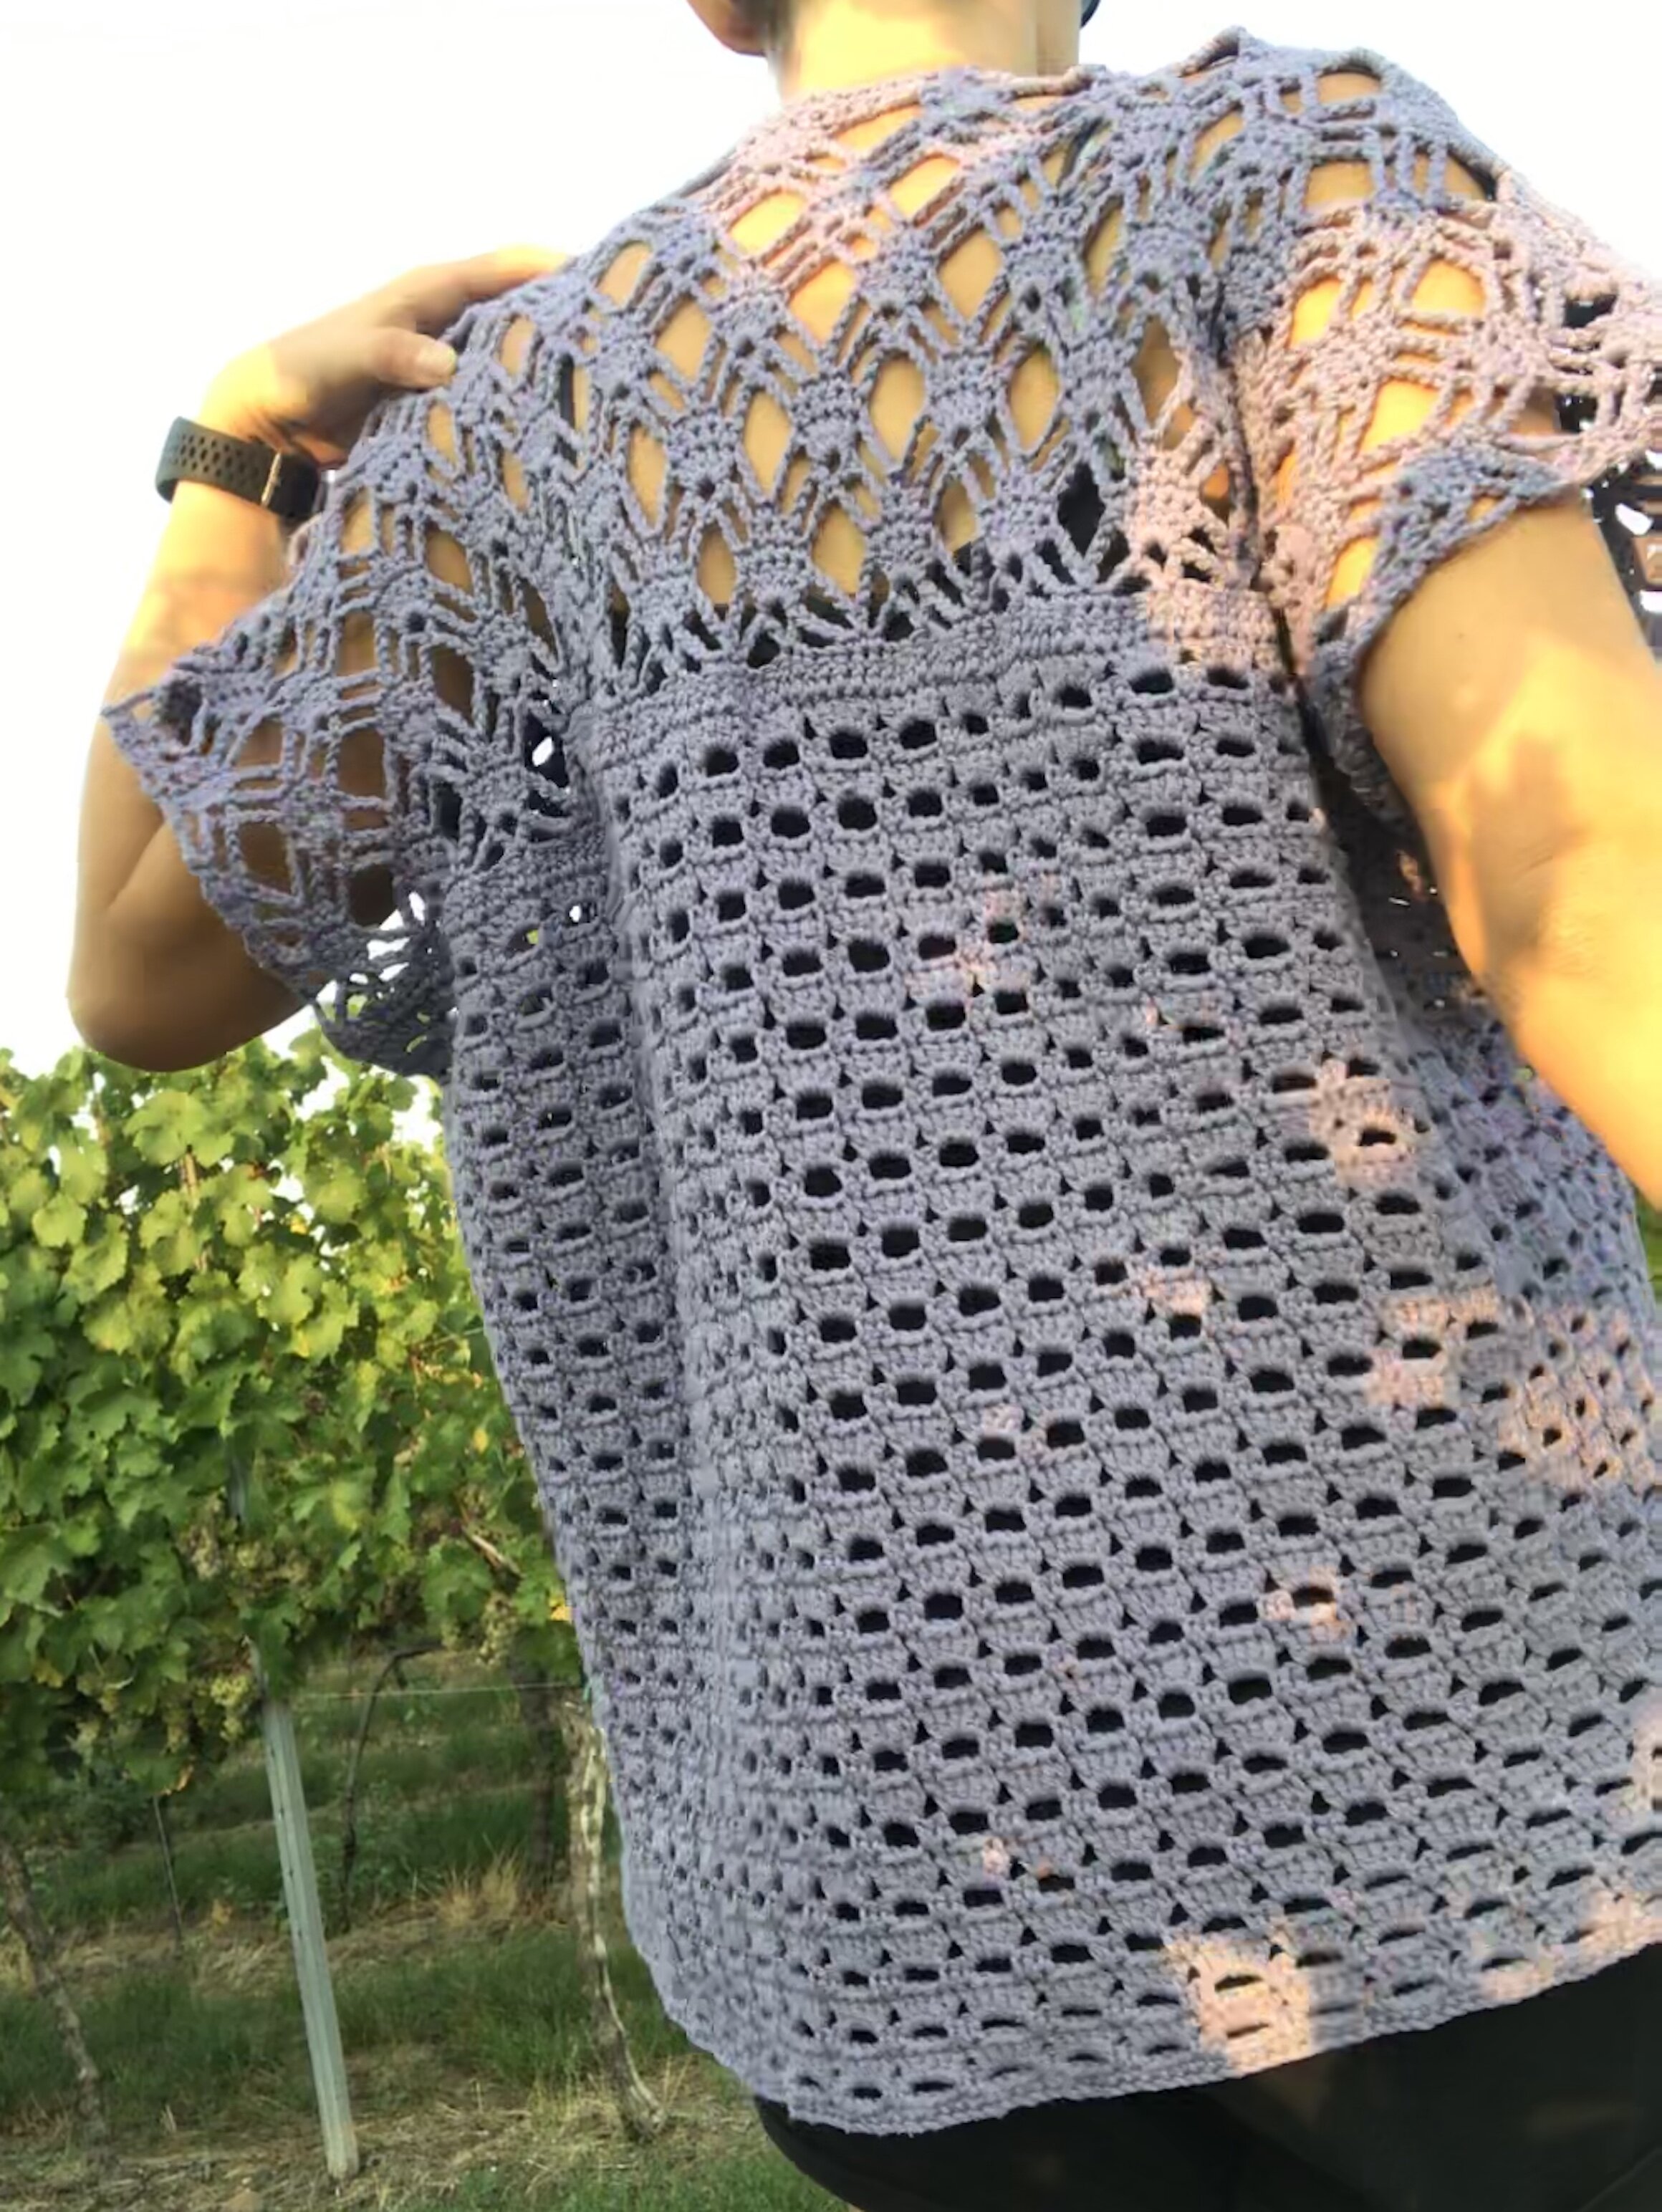
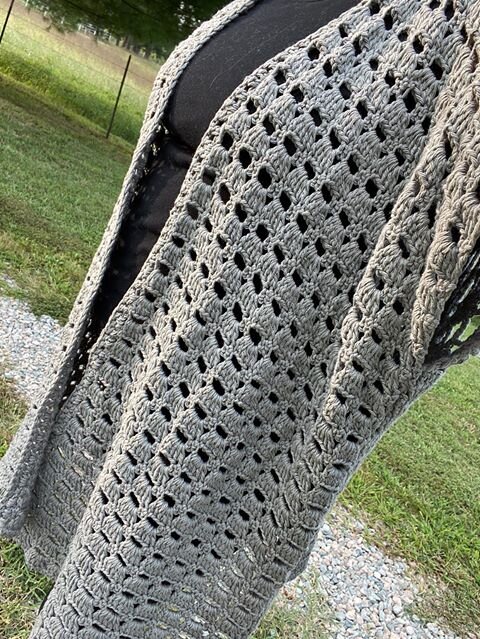
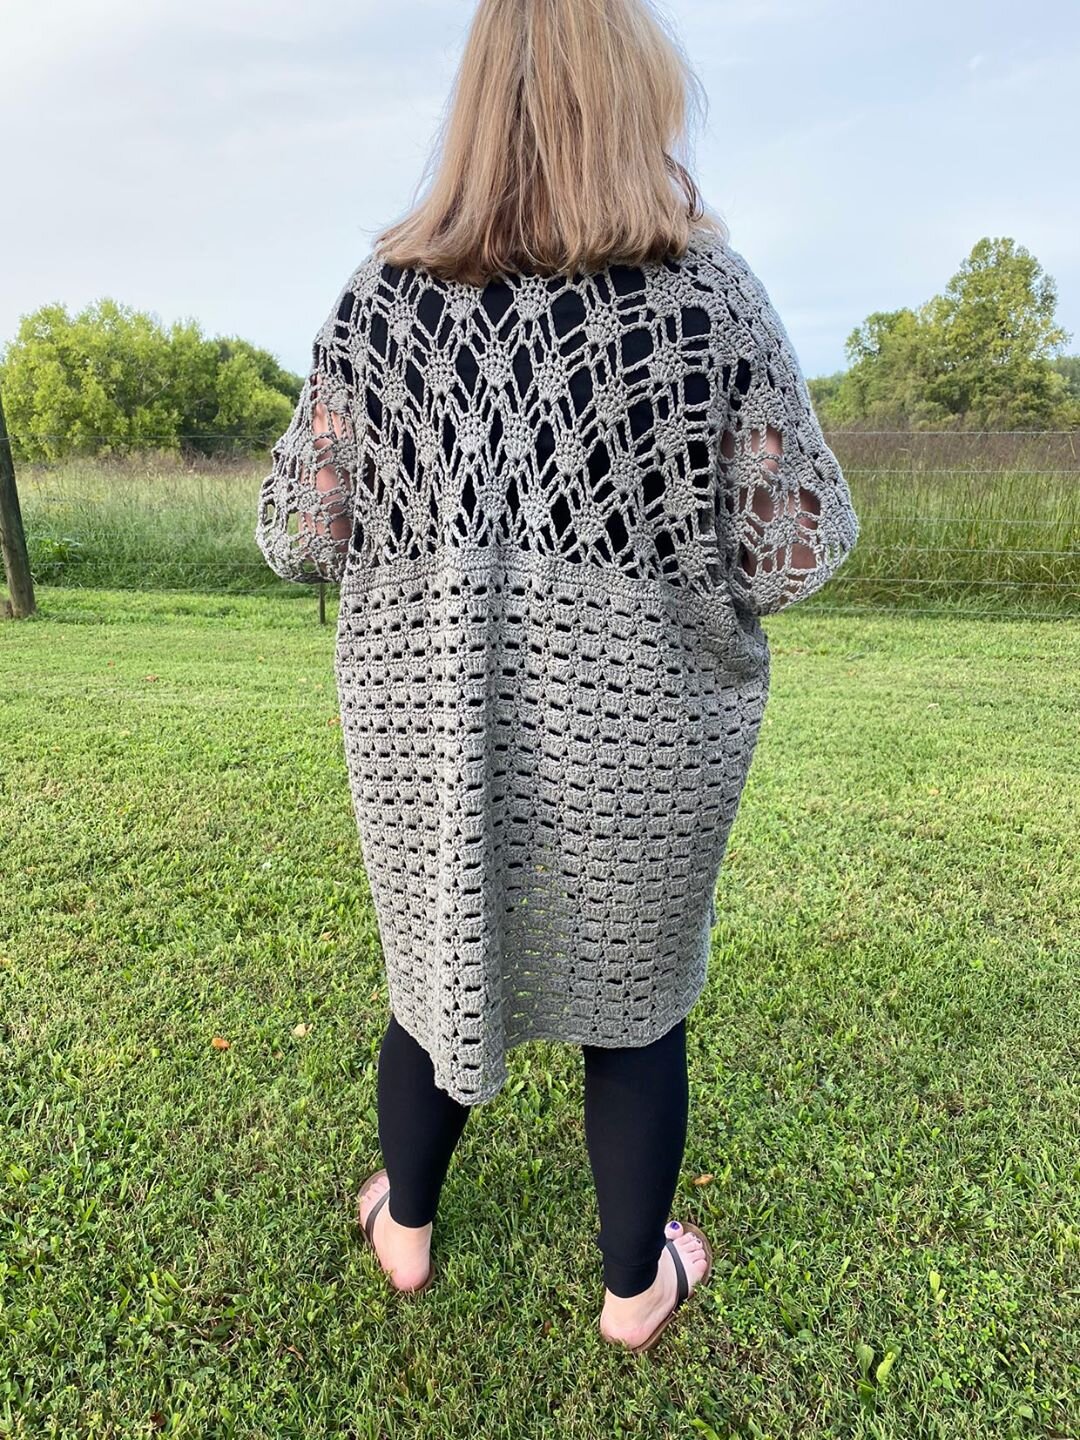
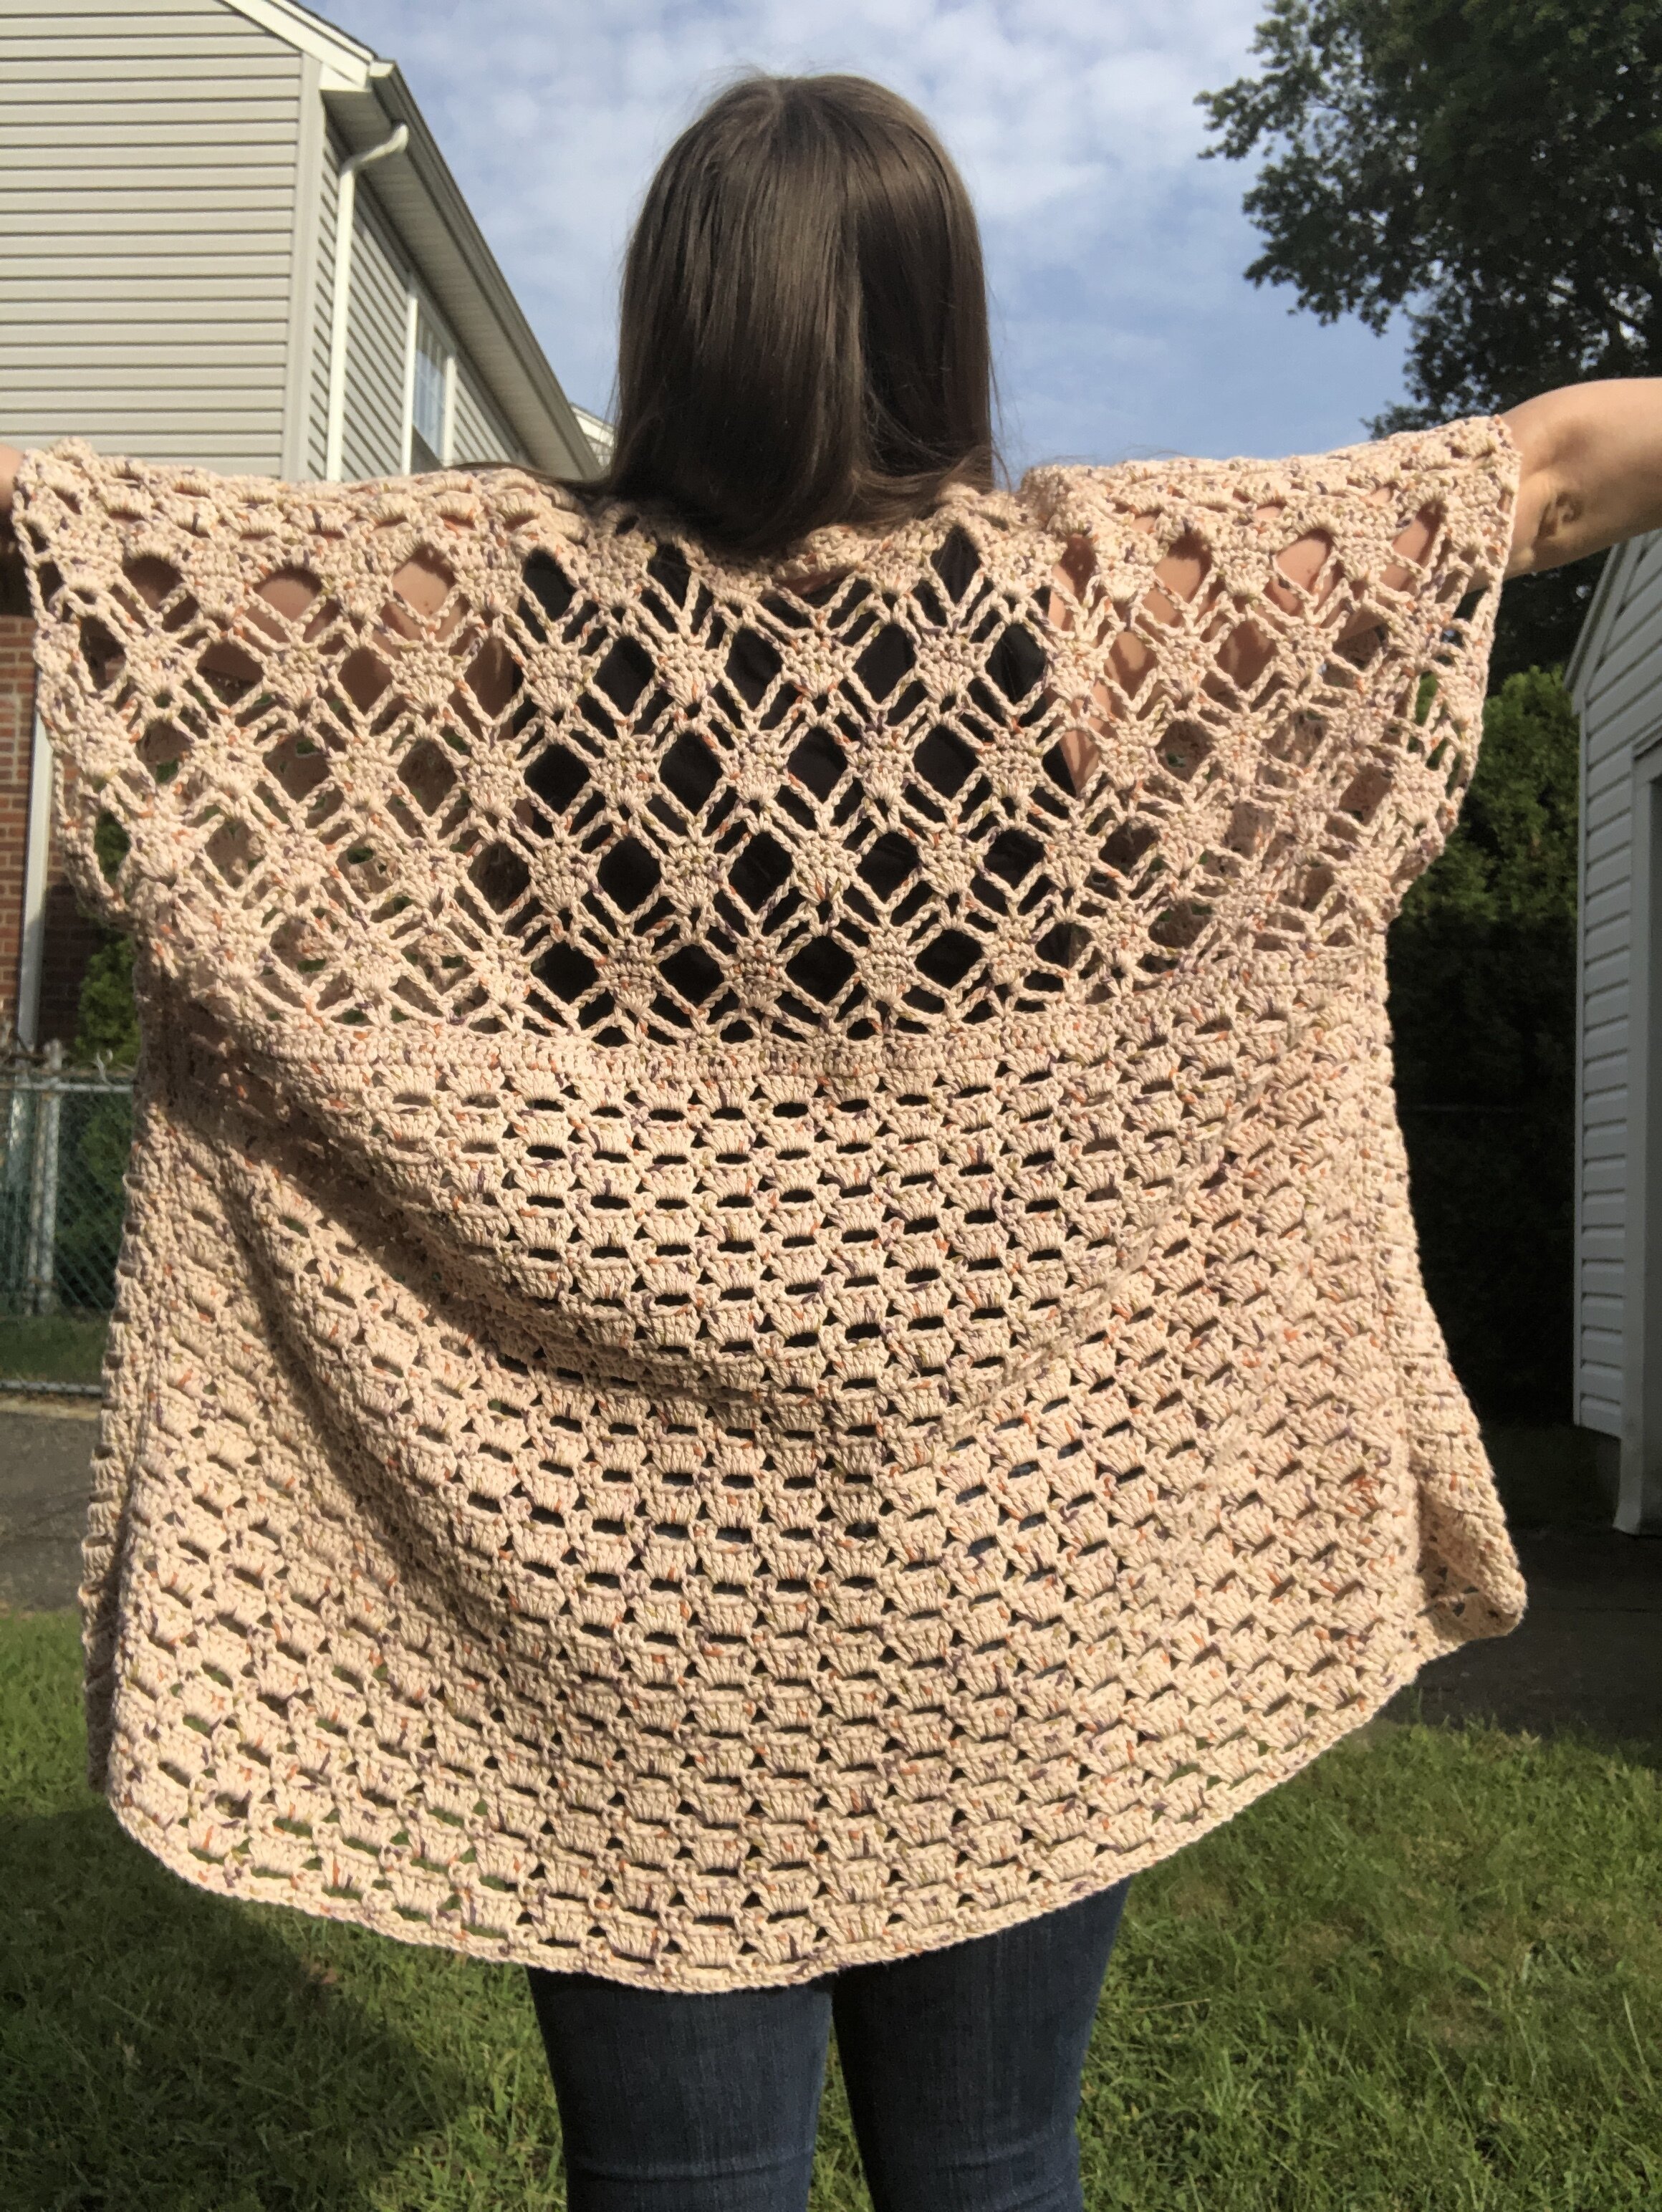
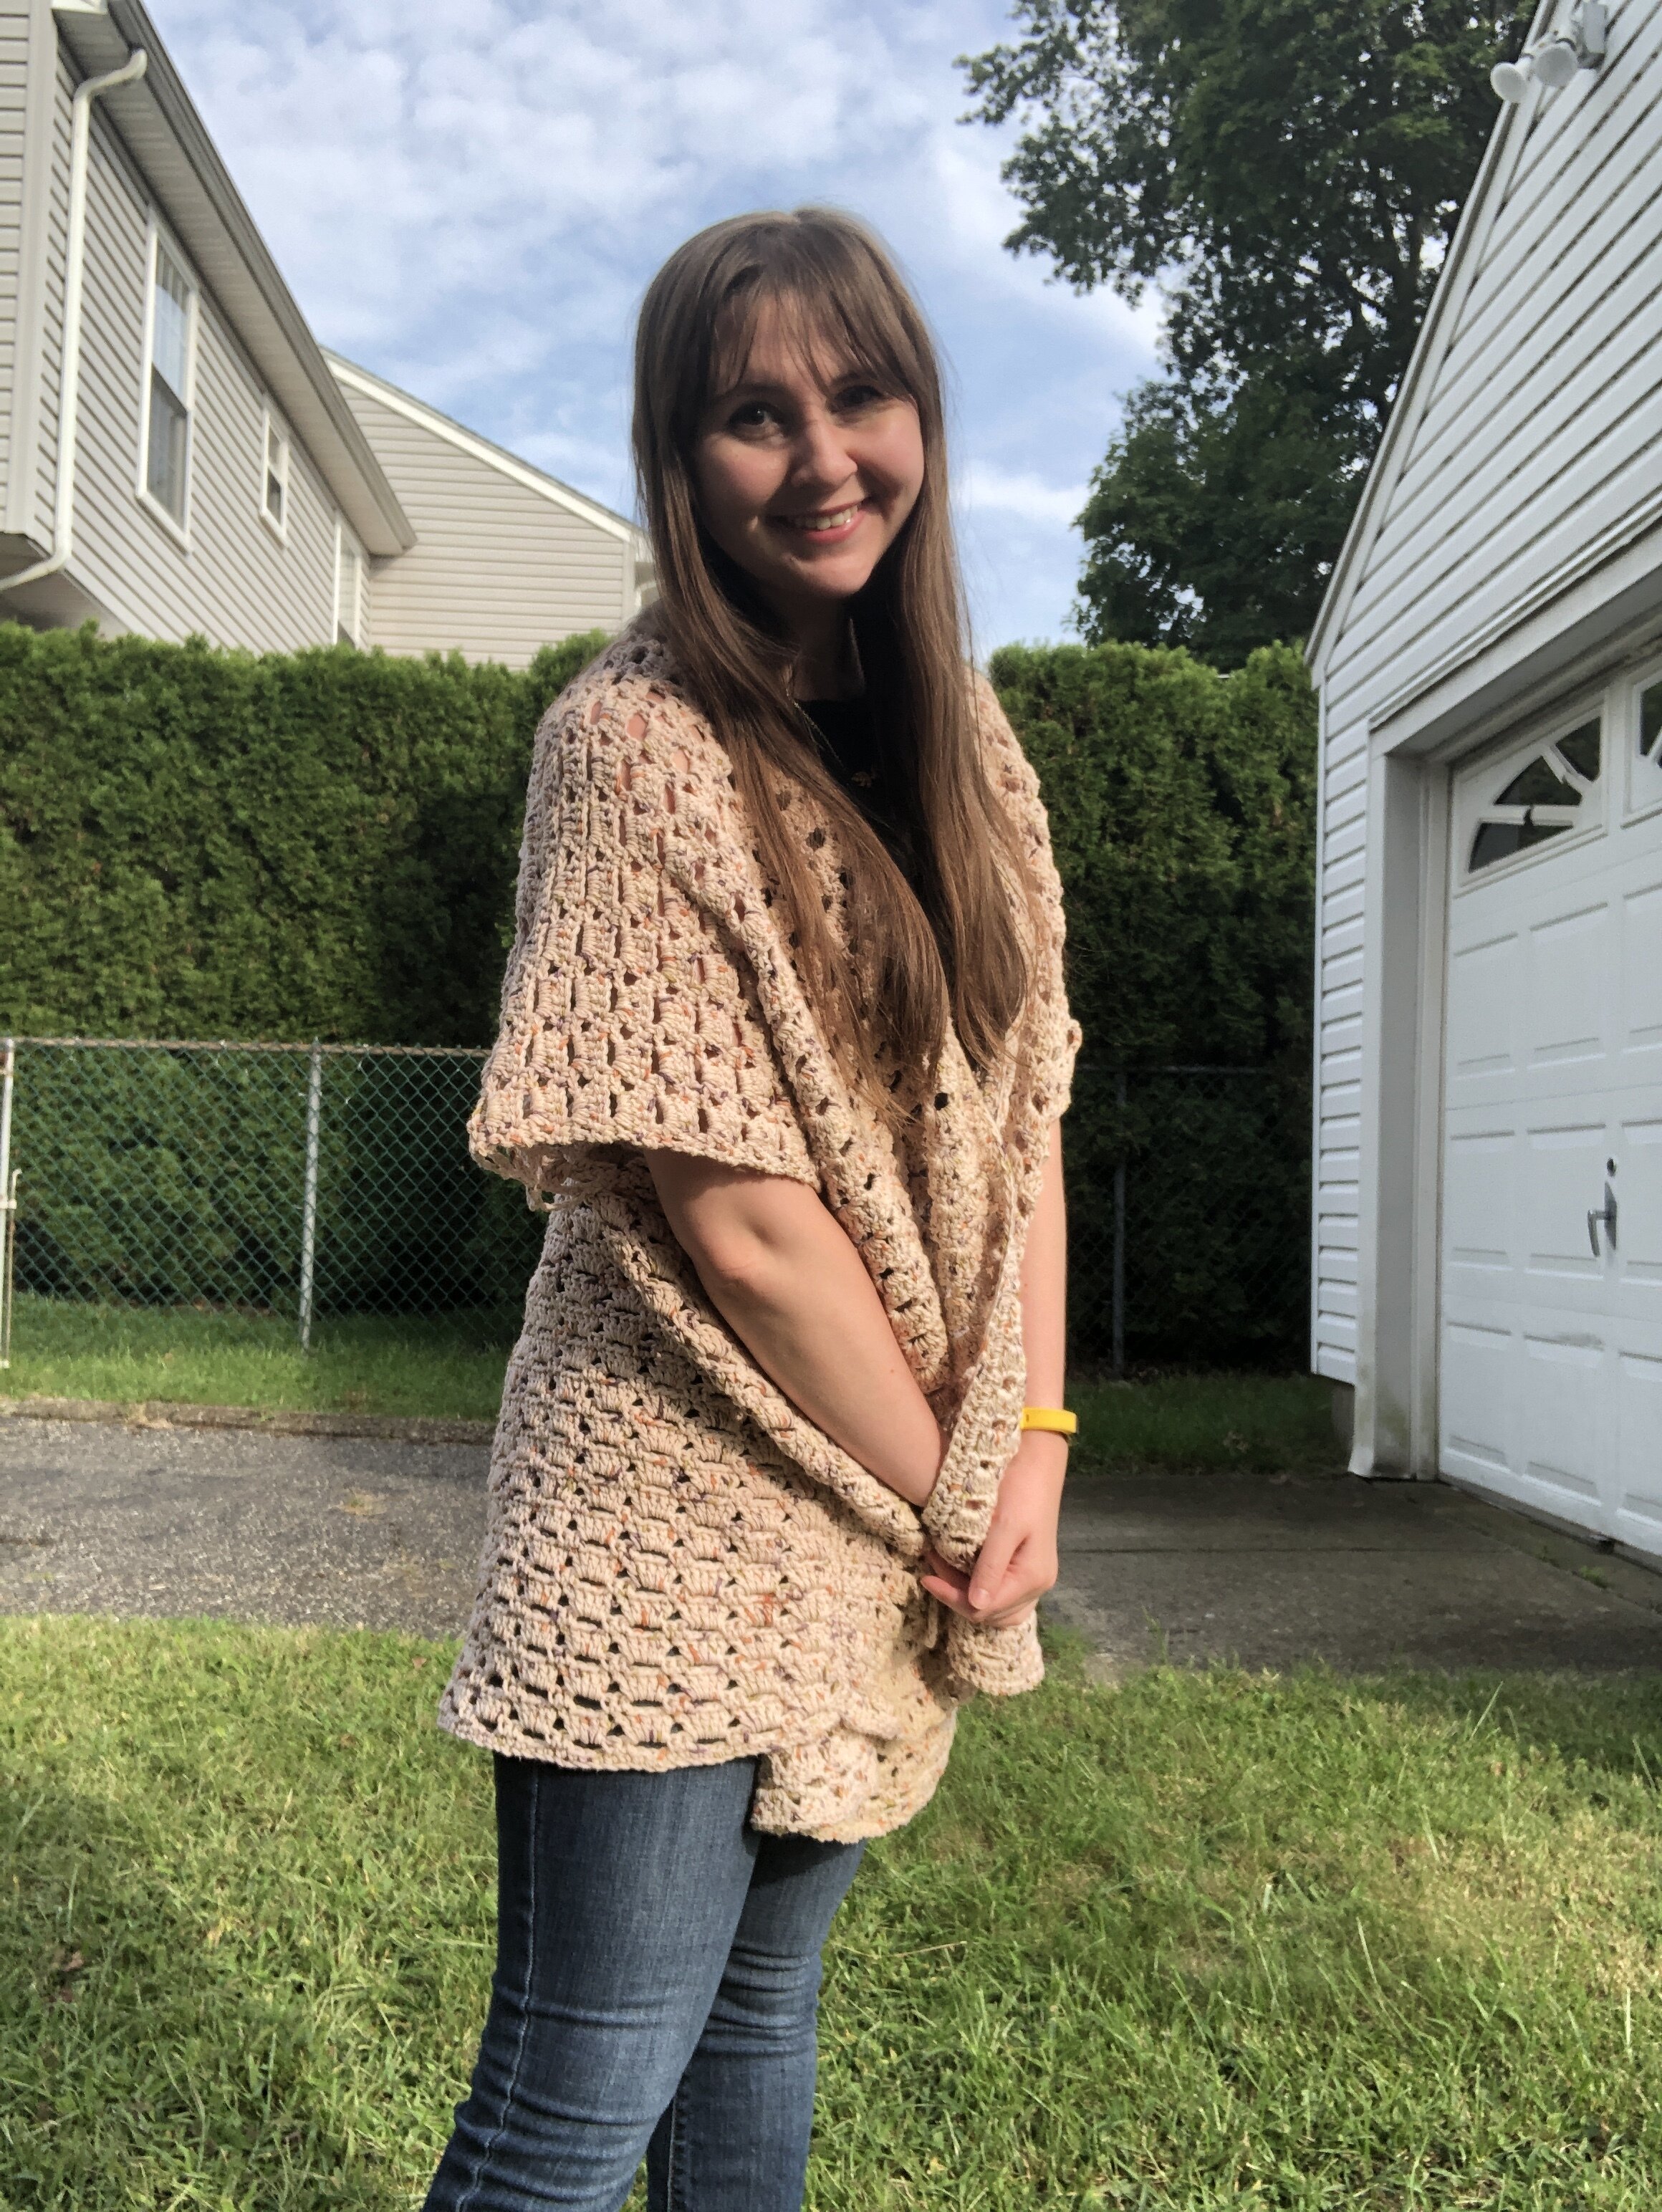
Which brings me to today’s new pattern. This is the Shells & Diamonds Kimono, and it is just the perfect item of clothing for transitional seasons, especially fall!
ABOUT THIS Top:
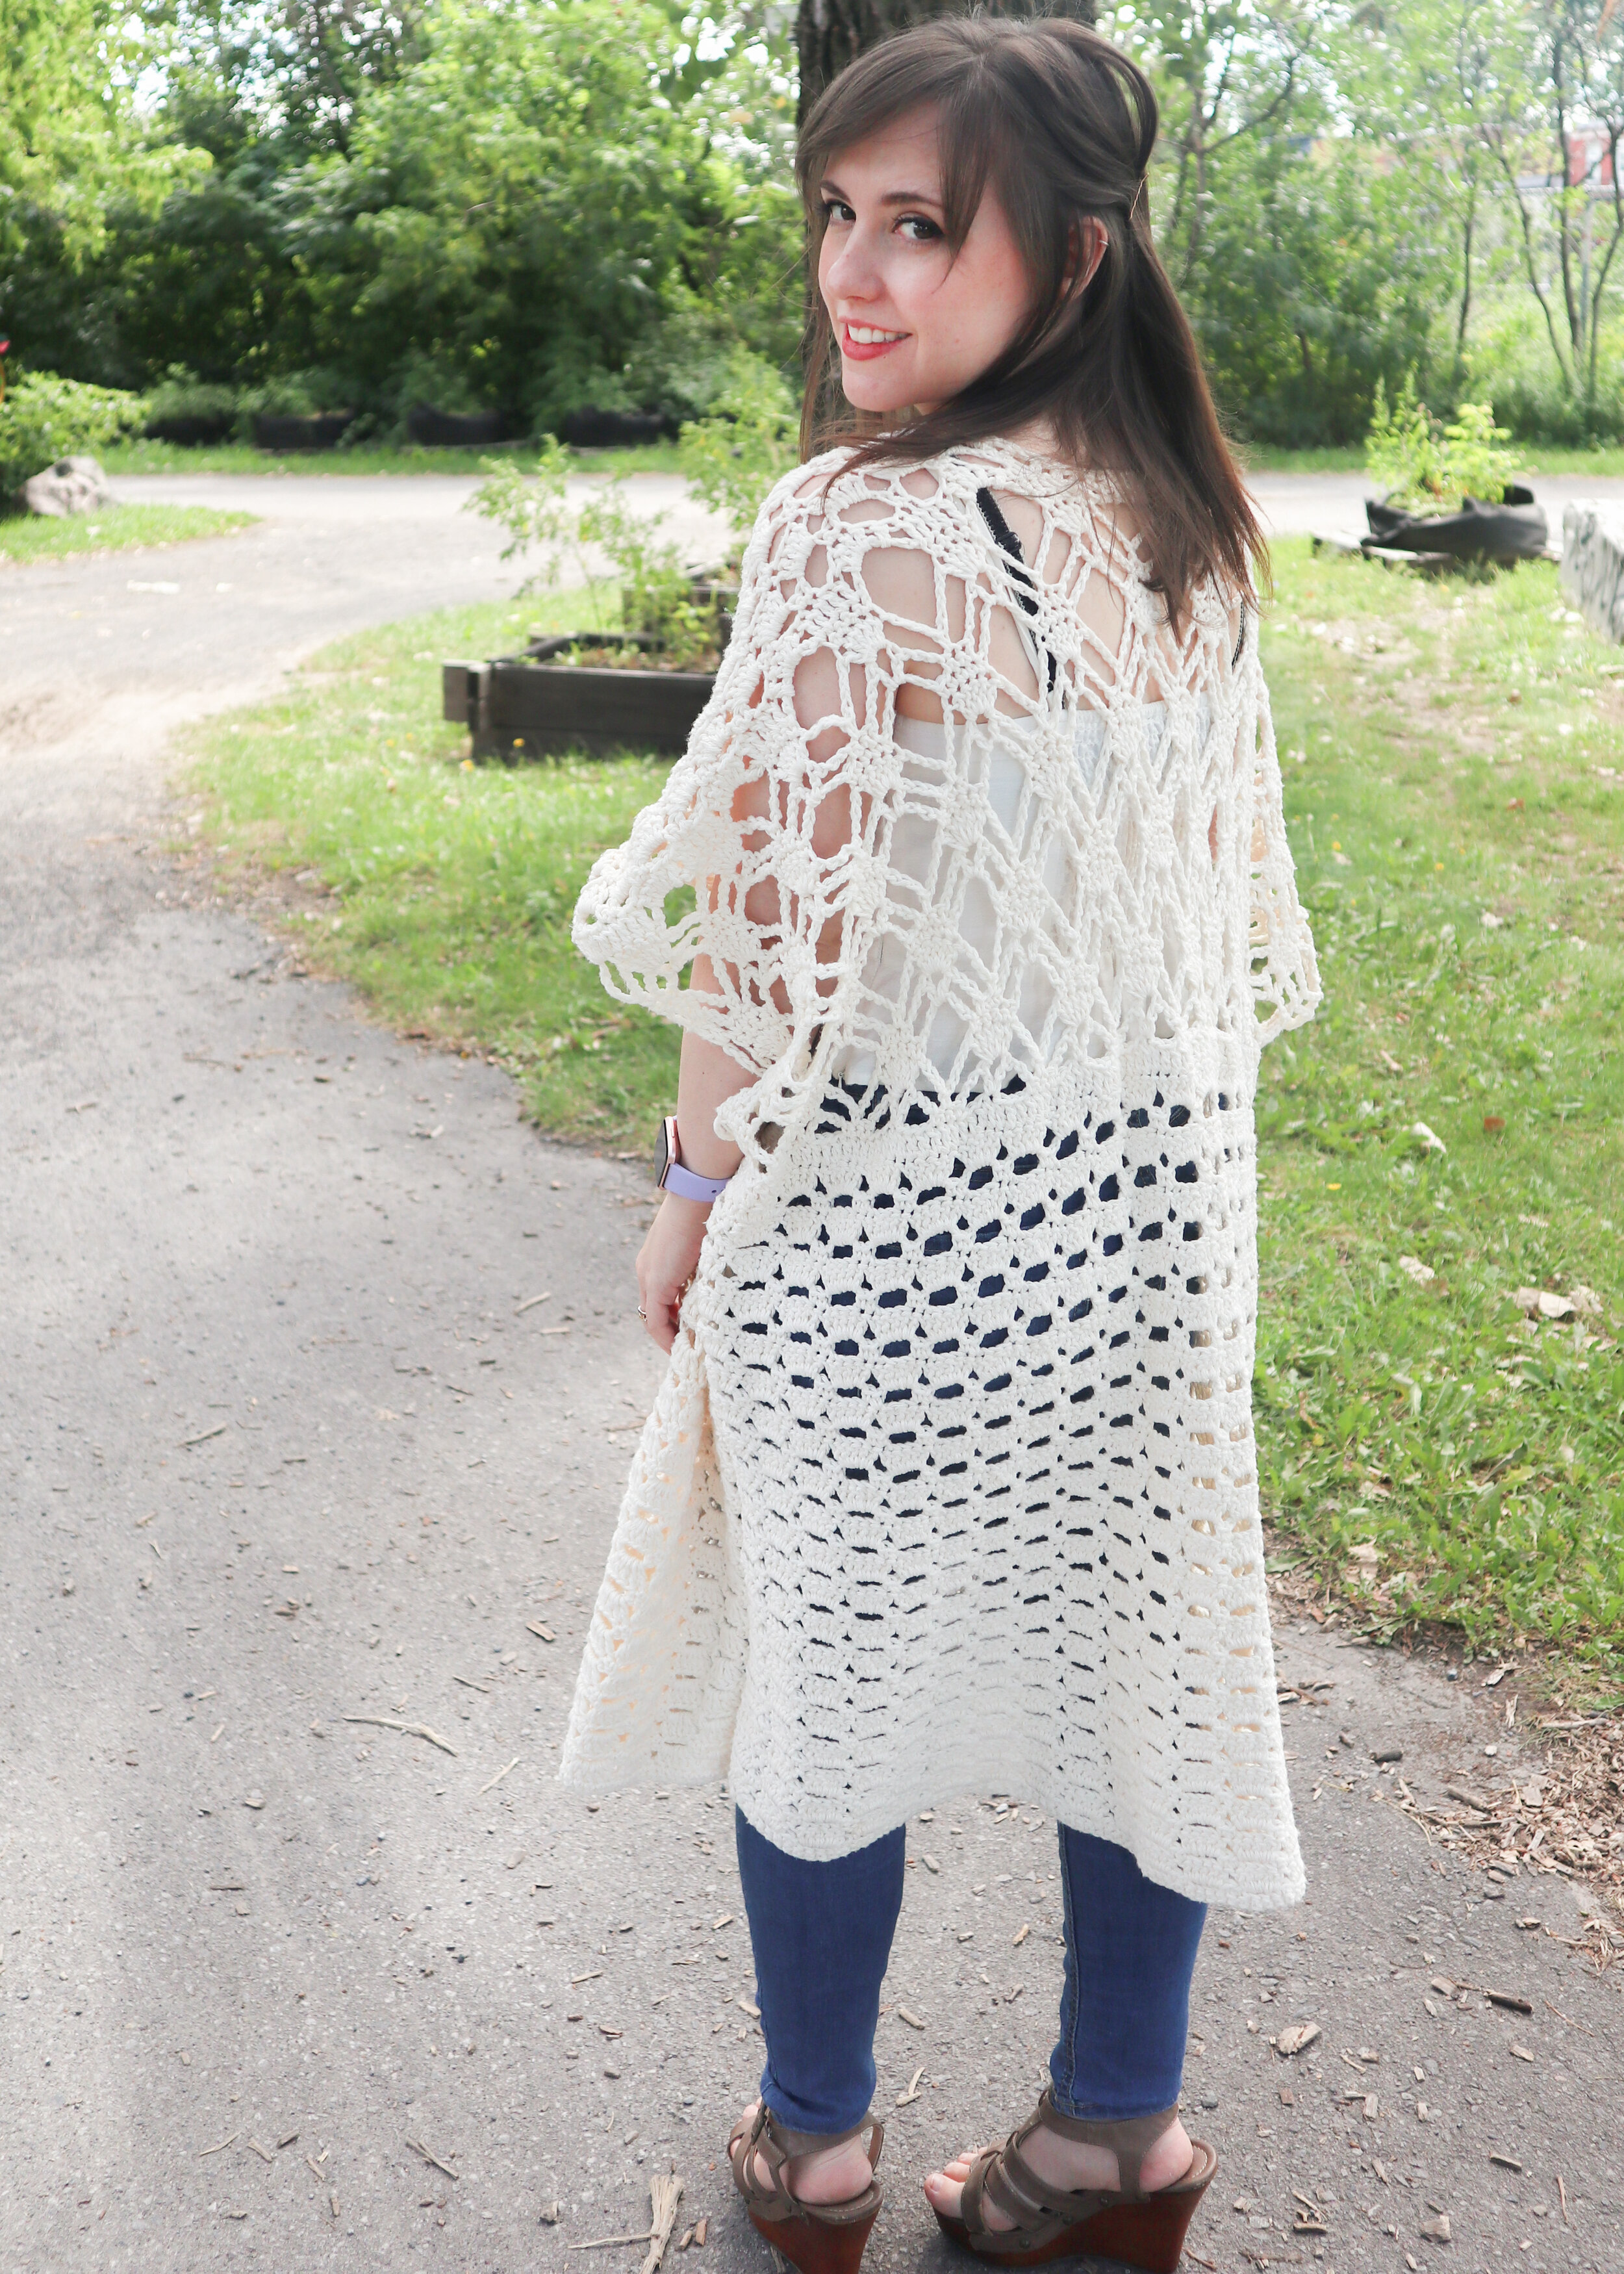
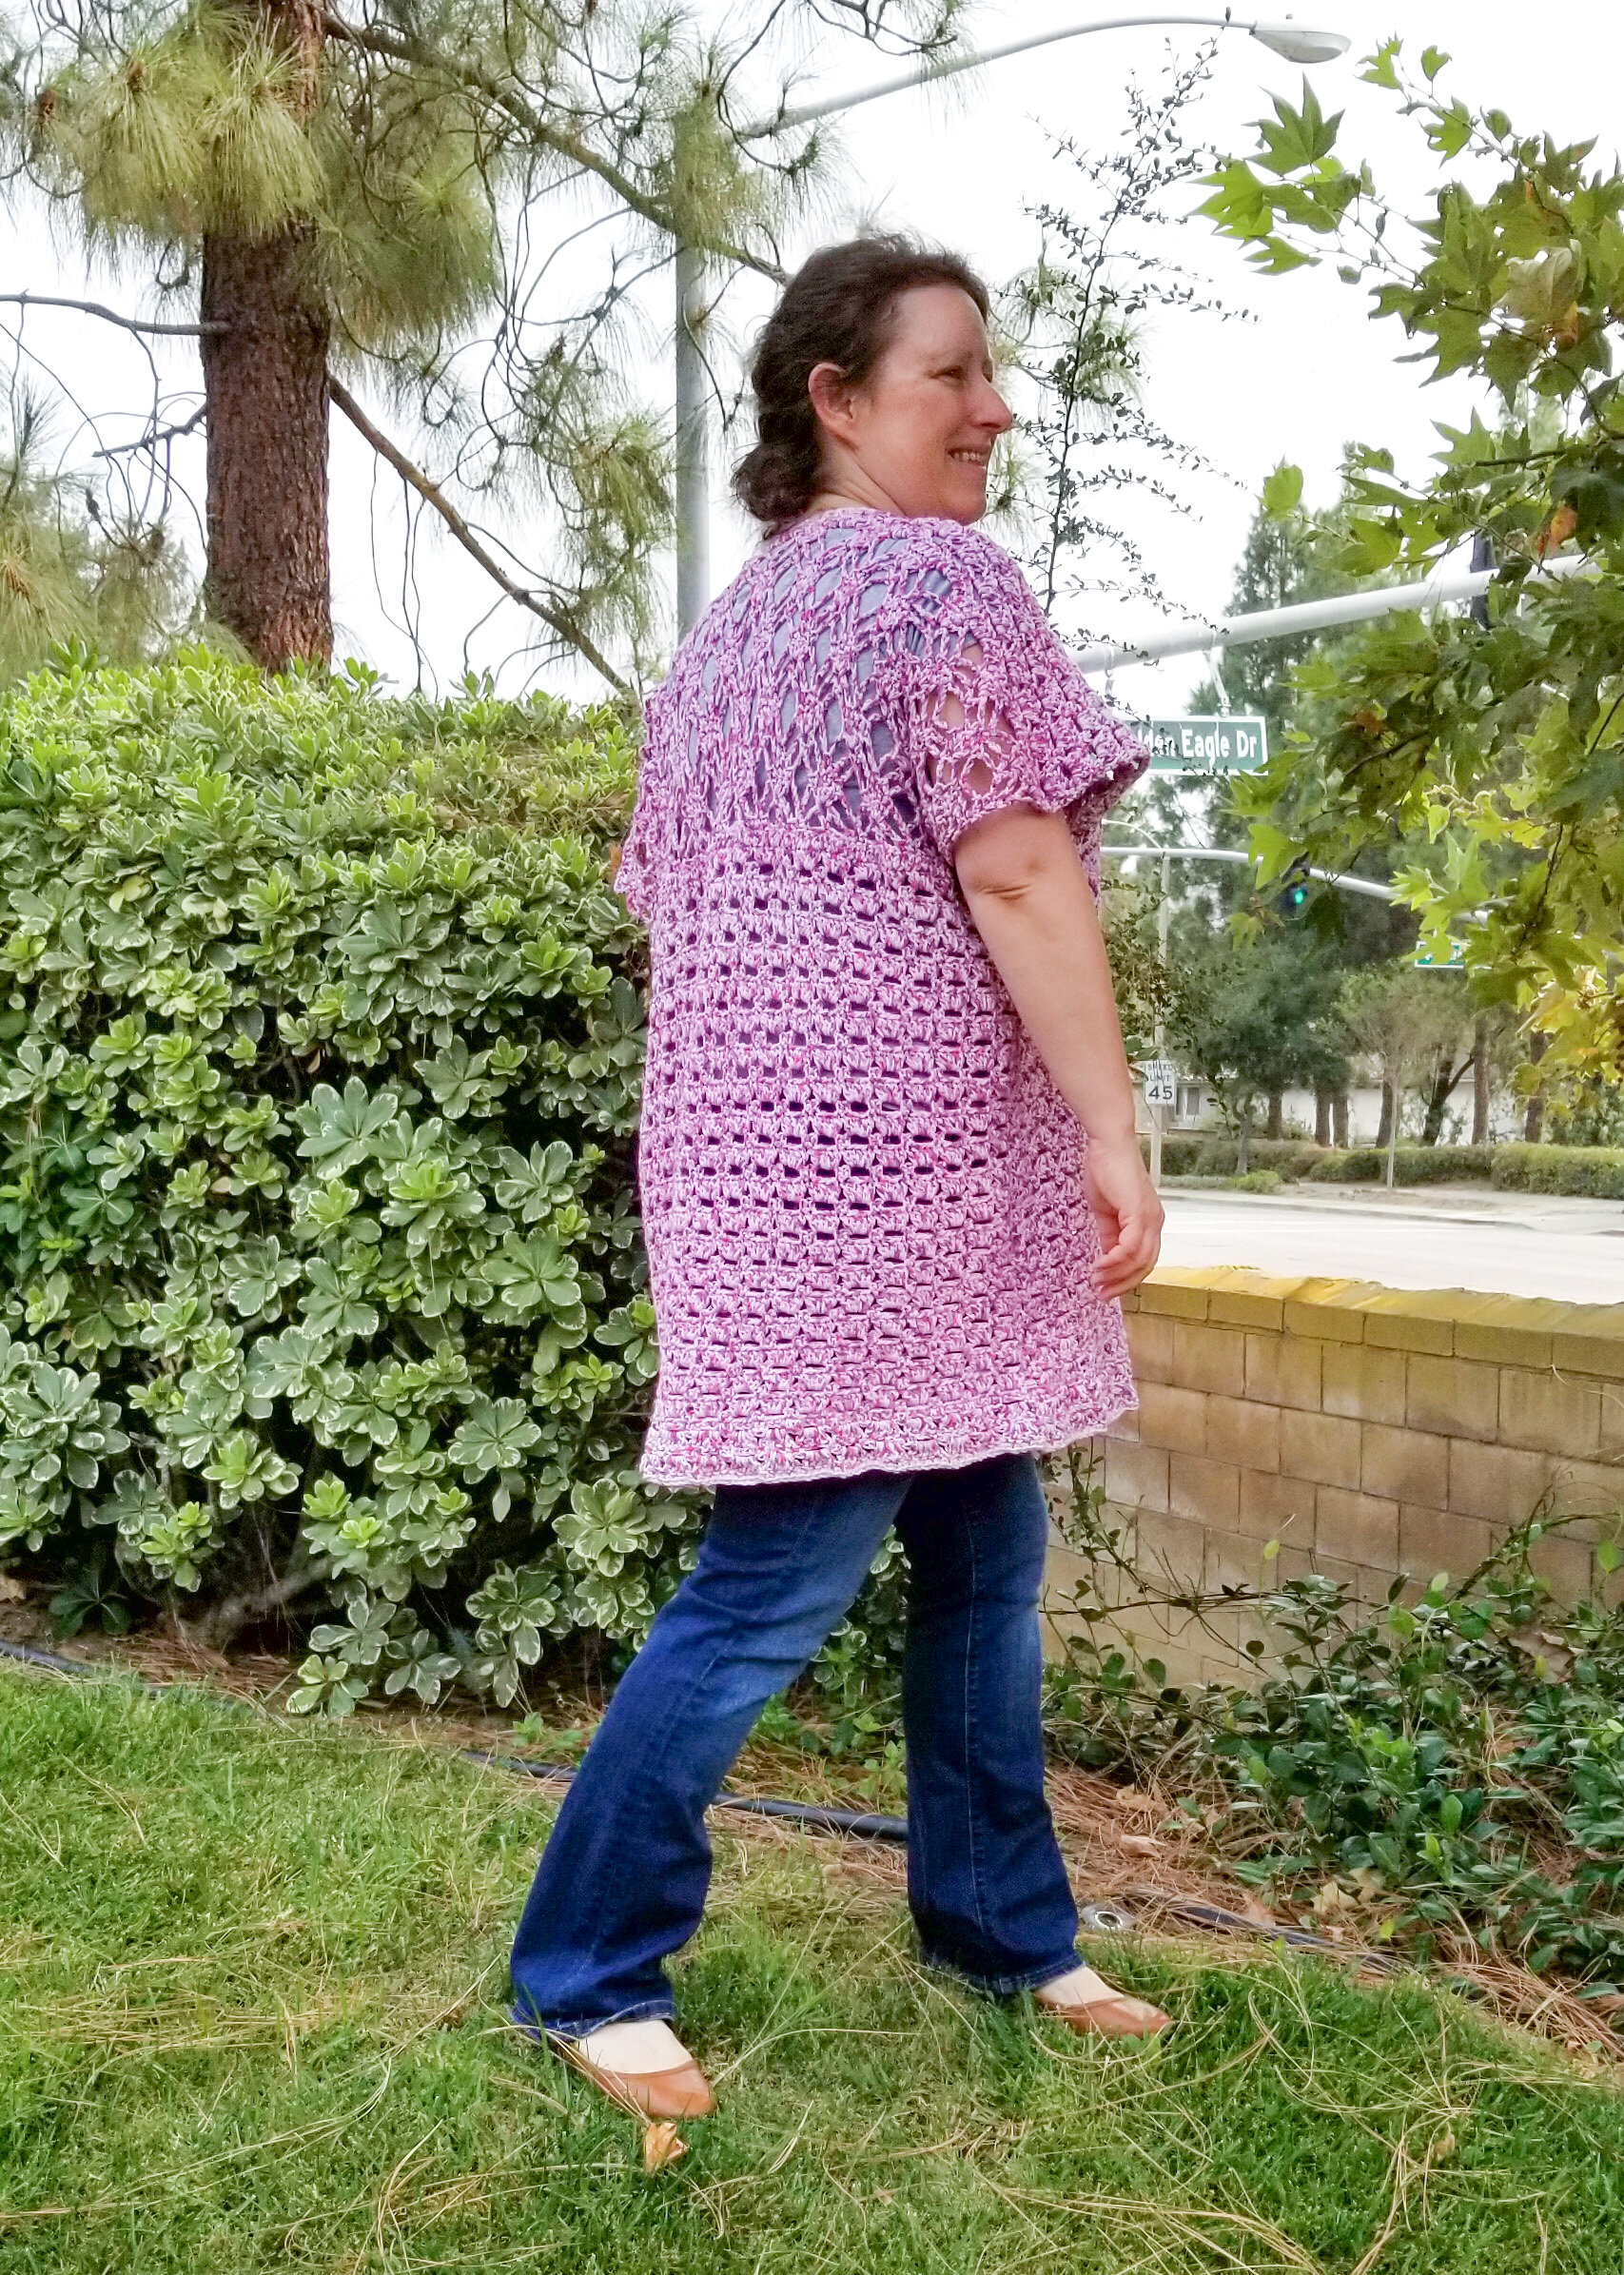
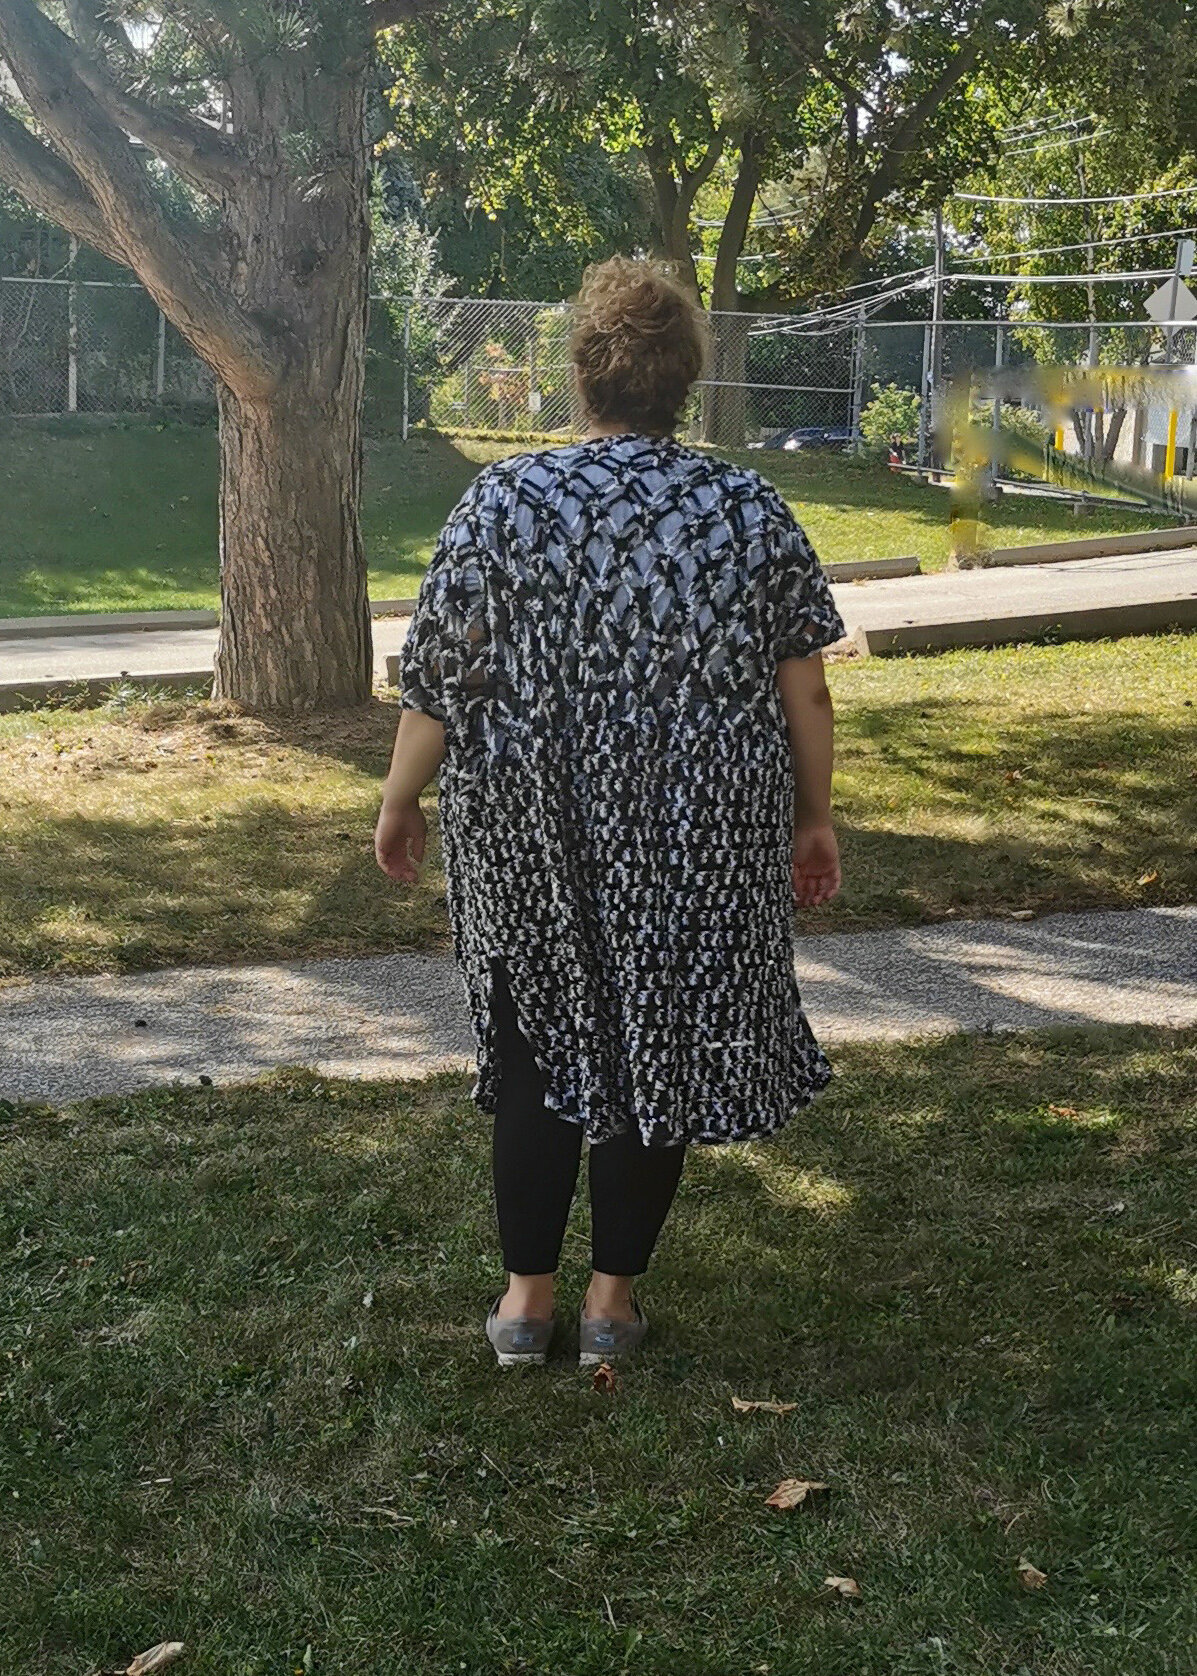
I wanted a simple silhouette, but with a gorgeous back panel that would take that simple silhouette and make it pop. This is what I came up with. I hope you like it as much as I do!
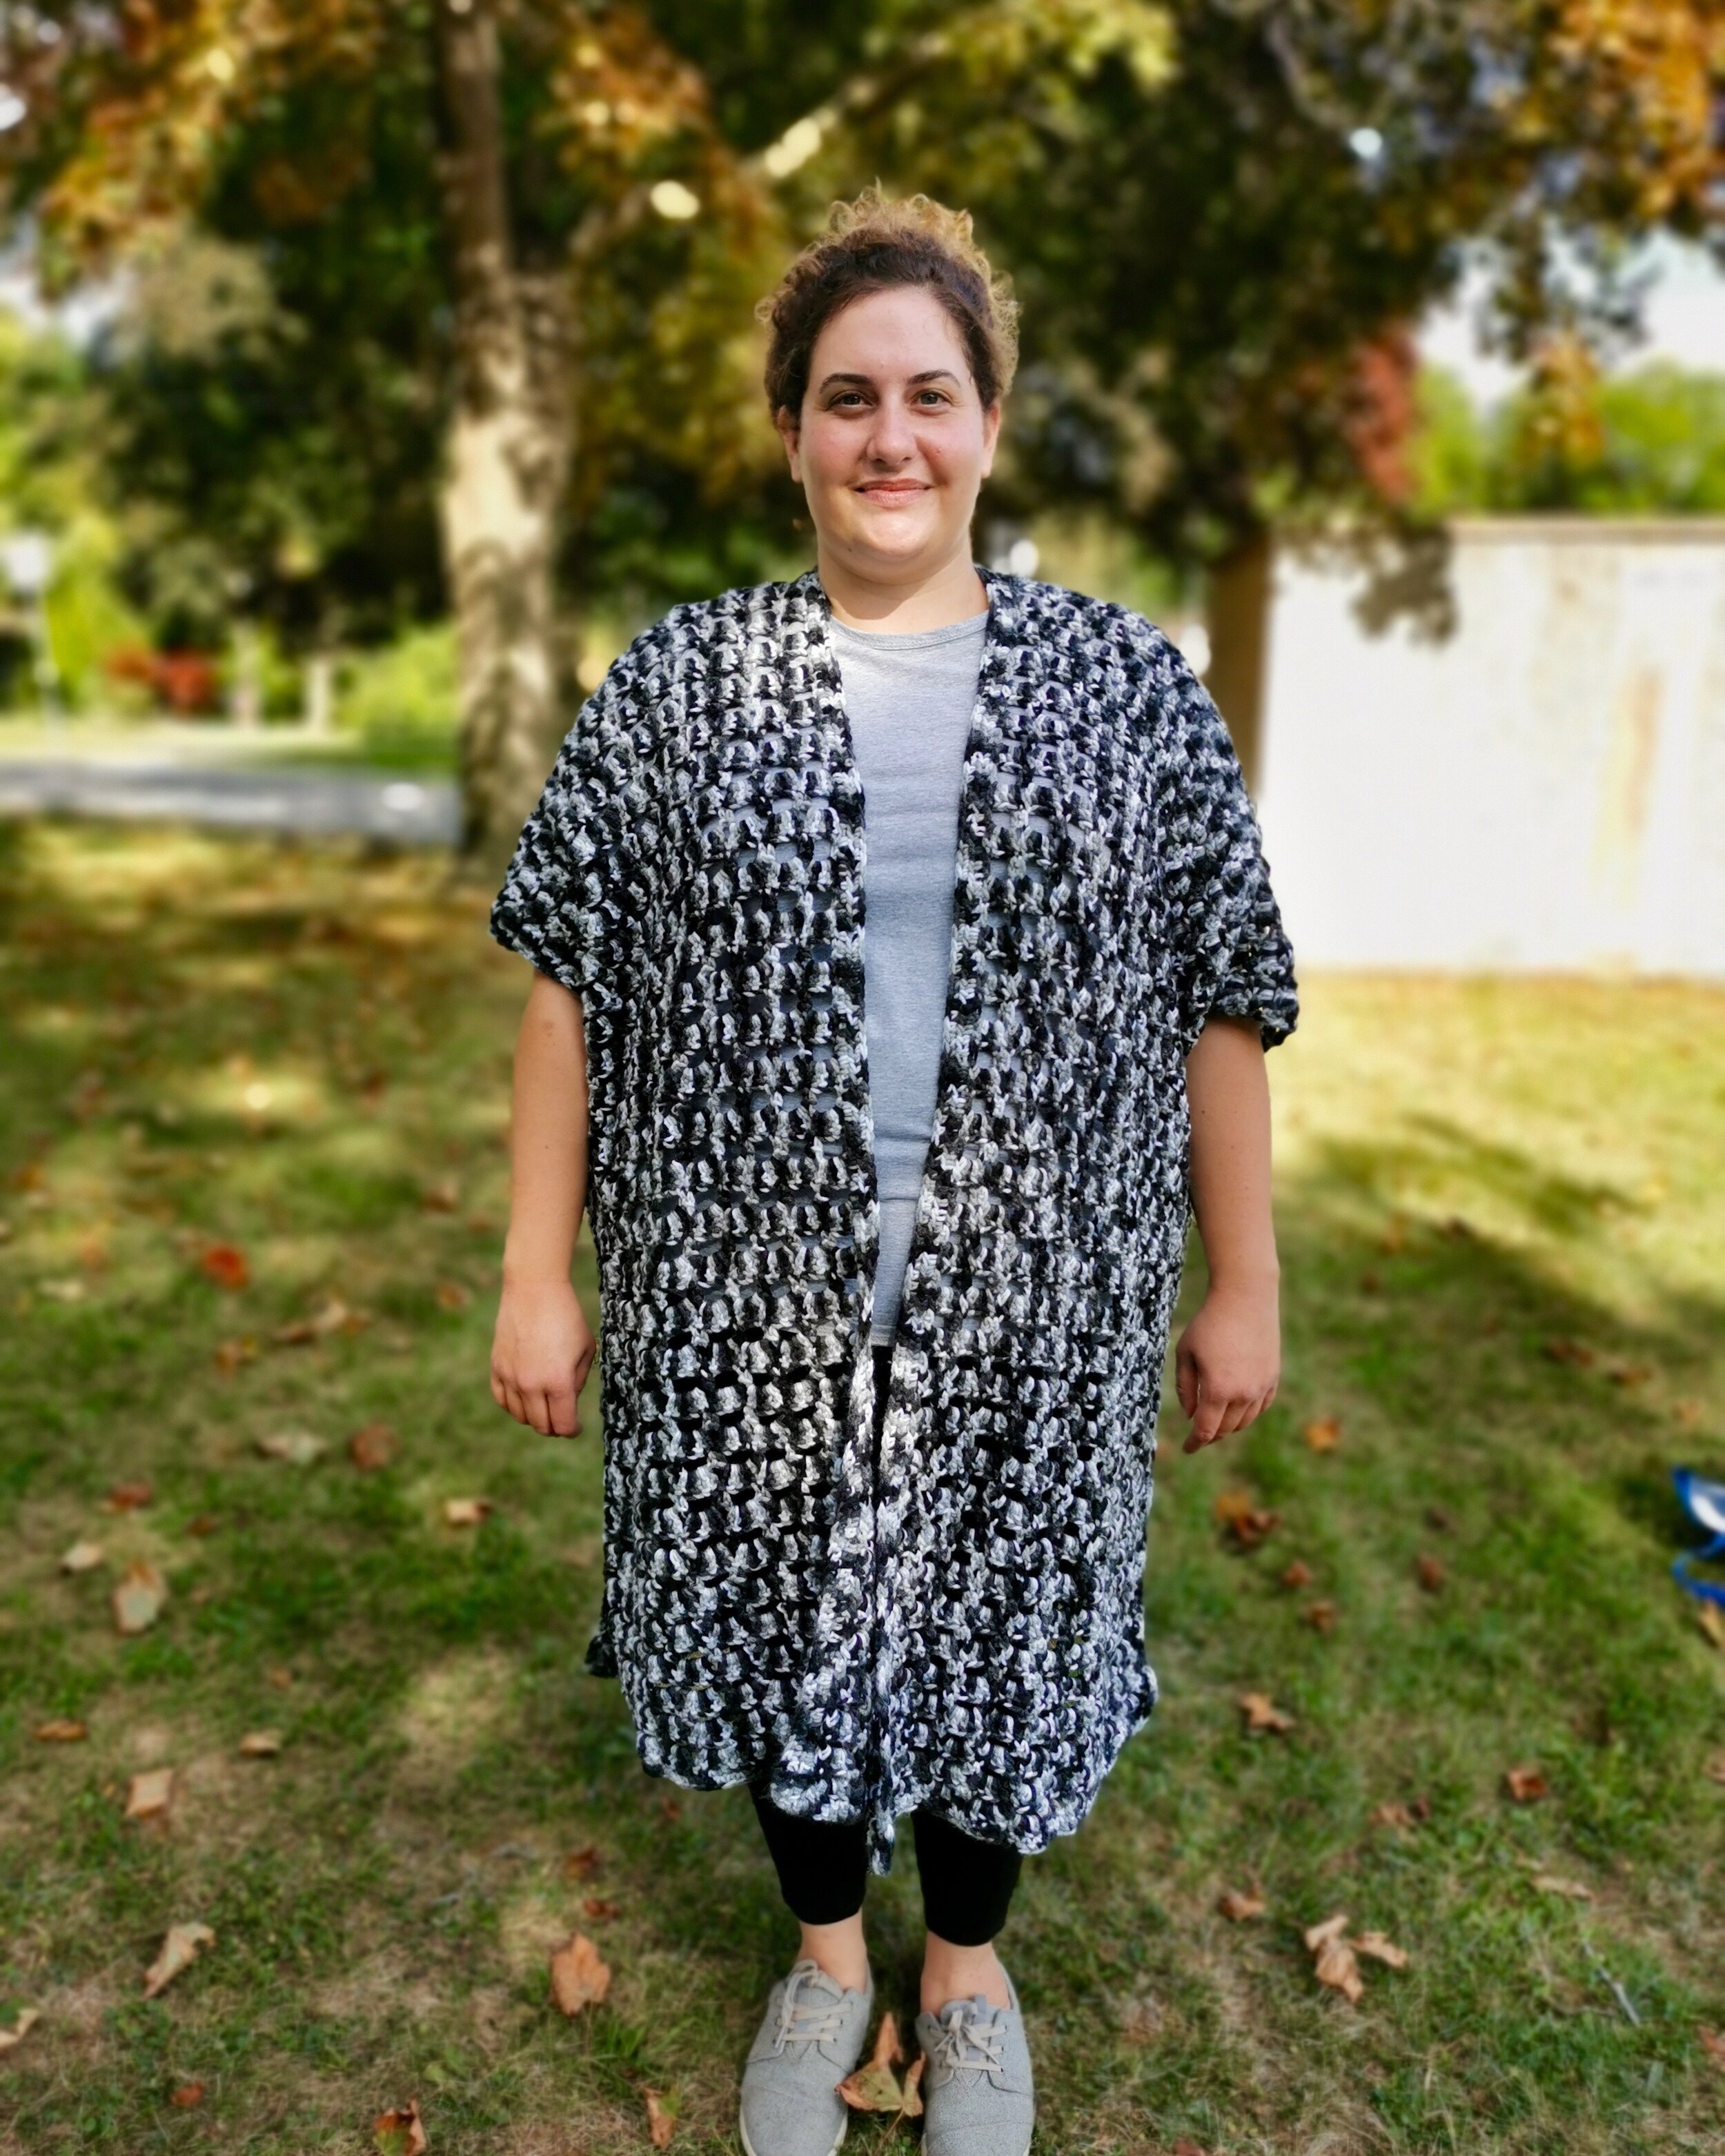
When I created this kimono, I used Lily Sugar’n Cream. This is a great economical cotton yarn. I chose cotton because it breathes and is cooler in the summer months. Lily Sugar’n Cream is a weight 4 aran 100% cotton yarn. It does make the kimono a little on the heavy side, so if you’re looking for a lighter weight, choosing a cotton blend or a lighter weight 4 acrylic will take some of the weight off. My testers used a variety of different yarns, including acrylic. Some have even decided to go back in an start making another kimono is a light weight wool so they can wear it into the later Fall months for more warmth!
I designed this kimono to have 4 sizes. S/M, L/XL, 2XL/3XL, and 4XL/5XL. With the openness and drapeiness of this fabric, it is accessible for many different sizes.
If you’d like a closer fitting kimono, you can make a size down. Or, if you’d like to try making a kimono with a lighter yarn (ie. weight 3), you can go up a size. Make sure you create a gauge swatch so you have an idea of which size to choose, though!
I hope you enjoy this kimono as much as I do!
THANK YOU! to all my wonderful testers!
Ali, Chanel, Chantel, Claudia, Jenna, Lea, Marty, and Teresa
I LOVE TO SEE WHAT YOU CREATE!
Please share your creations with the community on social media tagging @ravinsekaidesigns and hashtag #shellsanddiamondskimono
I can’t wait to see the beautiful things you come up with!
FOLLOW ME ON SOCIAL MEDIA
Facebook: Ravin Sekai Designs
Ravelry: RavinSekai
Instagram: @ravinsekaidesigns
Pinterest: Ravin Sekai Designs
Patreon: Ravin Sekai Designs
WHAT YOU NEED:
Needle Size: 5mm hook, or size needed to obtain gauge
Yarn: Medium weight 4 yarn. Sample crocheted in Lily Sugar’n Cream. Approx 1338(1495, 1661, 1834) yards.
Gauge: 13.33 st/ 7.33 rows = 4” in dc, 4 shell pattern repeats = 5.5” wide and 4” long
Ideal Bust Measurements: S/M : 32”-39”, L/XL: 40”-47”, 2XL/3XL: 48”-55”, 4XL/5XL: 56”-63”
Laid Flat : S/M: 33” wide x 35” long, L/XL: 35.75” wide x 37.25” long, 2XL/3XL: 38.5” wide x 38.5” long 4XL/5XL: 41.25” wide x 39.75” long (measurements after blocking)
Model Sizing: model has 35” bust, is 4’11”, and is wearing the S/M size.
ABBREVIATIONS:
Abbreviations in US terms
RS: Right side
WS: Wrong side
St/Sts: Stitch/Stitches
Ch: Chain
Sc: Single Crochet
Dc: Double Crochet
Tc: Treble crochet
Sk: skip
Rep: repeat
FO: fasten off
Cont.: continue
Notes:
Ch2 and ch3 counts a 1 st throughout.
If you want a more form fitting kimono, go ahead and make a size down. The kimono has between 17 - 25” of positive ease to make sure the garment drapes in the best possible way.
If you want a longer kimono, add a few more repeats of shells. Just make sure you add the same amount of shell repeats to the front panels as you do the back. For reference, I am 4’11”. Remember, with wash and wear, the weight of the yarn may also cause the kimono to stretch, so keep that in mind.
Make sure you maintain a looser tension in the top lace portion. Having a tighter tension will result in a much shorter kimono!
Back
Ch 123(133, 143, 153)
Row 1: sc in 2nd ch from hook. Sc across. Turn. 122(132, 142, 152) st
Row 2: ch1, sc in 1st two st, *ch3, sk3, sc in next 2 st* rep * * across to last 2 st and make 1sc in each. Turn.
Row 3: ch3 (counts as 1 st), 5dc in ch3 space below all the way across, dc in last sc. Turn. 122(132, 142, 152) stRow 4 - Row 43(45, 47, 49): Cont Row 2 - 3 20(21, 22, 23) more times.
Start Lace
Row 44(46, 48, 50): ch3, (counts as one st), dc across. Turn. 122(132, 142, 152)st
Row 45(47, 49, 51): ch2, (counts as one st), 1sc, *ch3, sk3, [1dc, ch2, 1dc] all in next st, ch3 st, sk3, 3sc*, rep * * 10(11,12,13) more times, ch3, sk3, [1dc, ch2, 1dc] all in next st, ch3, sk3, 1sc, sk1, 1sc in ch3 space below. Turn.
Row 46(48, 50, 52): ch6, *5dc in middle of ch2 space, ch4, sc in center st of 3sc below, ch4* rep * * 10(11,12,13) more times. 5dc in middle of ch2 space, ch4, sc in ch2 space below. Turn.
Row 47(49, 51, 53): ch7, *1sc in each of the 5 dc below, ch7*, rep * * 10(11,12,13) more times, 1sc in each of the 5 dc below, ch3, tc in ch6 space below. Turn.
Row 48(50, 52, 54): ch3, 1dc in tc below, *ch3, 1sc in each of the center 3 sc below, ch3, [dc, ch2, dc] all in center of ch7 space below* rep * * 10(11,12,13) more times, ch3, 1sc in each of the center 3 sc below, ch3, 2dc in ch7 space below. Turn.
Row 49(51, 53, 55): ch3, 2dc in 1st dc below, *ch4, sc in center st of 3sc below, ch4, 5dc in ch2 space* rep * * 10(11,12,13) more times, ch4, sc in center st of 3sc below, ch4, 3dc in last st. Turn.
Row 50(52, 54, 56): ch2, 1sc in each dc below, *ch7, 1sc in each of the 5 dc below* rep * * 10(11,12,13) more times, ch7, 3sc. Turn.
Row 51(53, 55, 57): ch2, sc in 2nd st, *ch3, [1dc, ch2, 1dc] all in center of ch7 space below, ch3, 1sc in each of the center 3 sc below* rep * * 10(11,12,13) more times, ch3, [1dc, ch2, 1dc] all in center of ch7 space below, ch3, sc in 2nd to last st and last st. Turn.
Row 52(54, 56, 58) - Row 59(61, 63, 65): Rep Row 46(48, 50, 52) - 51(53, 55, 57) once more and then Row 46(48, 50, 52) - 47(49, 51, 53)
Row 60(62, 64, 66): ch3 (does NOT count as a st), 3dc in the 1st ch3 space, *1dc in each of the 5 sc below, and 5 dc in ch7 below* rep * * 10(11,12,13) more times, 1dc in each of the 5 sc below, 4dc in last ch 7. 122(132, 142, 152) st
Separation of front panels:
Right Side
Row 1: ch1, sc in 1st two st, *ch3, sk3, sc in next 2 st* rep * * 10(11, 12, 13) more times. Leave remaining sts unworked. Turn.
Row 2: ch3, 5dc in each ch3 space below all the way across, dc in last sc below. Turn. (11, 12, 13, 14 fans in total)
Row 3 - Row 62(64, 66, 68): rep Row 1 - 2 30(31, 32, 33) more times.(29, 30, 31, 32 times total)
Row 63(65, 67, 69): ch1, sc across, sc in last ch3 space.
FO
Left Side:
Row 1: Attach yarn to ch3 space on opposite side of piece. ch1, sc in ch3 space again and sc in next st. *ch3, sk3, sc in next 2 st*. Rep * * 10(11, 12, 13) more times, leave remaining sts unworked. Turn.
Row 2: ch3, 5dc in ch3 space below all the way across, dc in last sc below. Turn. (11, 12, 13, 14 fans in total)
Row 3 - Row 62(64, 66, 68): rep Row 1 - 2 30(31, 32, 33) more times.(29, 30, 31, 32 times total)
Row 63(65, 67, 69): ch1, sc across, sc in last ch3 space.
FO
Fold front panels down and seam sides leaving at least 10 inches for arm holes.
Collar:
With RS facing, attach yarn to bottom right side of kimono. Ch3, 1dc in each ch1 space and 2dc in each ch3 space up side, dc evenly across neck, dc in the same pattern down the left side.
FO
Weave in Ends.
Block garment aggressively.
Happy Crocheting!
IF YOU LIKED THIS PATTERN, PLEASE SUPPORT ME ON PATREON OR BUY ME A COFFEE!
I LOVE TO SEE WHAT YOU CREATE!
Please share your creations with the community on social media tagging @ravinsekaidesigns and hashtag #shellsanddiamondskimono
I can’t wait to see the beautiful things you come up with!
FOLLOW ME ON SOCIAL MEDIA
Facebook: Ravin Sekai Designs
Ravelry: RavinSekai
Instagram: @ravinsekaidesigns
Pinterest: Ravin Sekai Designs
Patreon: Ravin Sekai Designs


